Longwinded Life Update, Big News, New Website and a bit of a Rebrand!

Hi,

If you are reading this, thank you for still being here and not having given up on me completely. I wouldn’t have blamed you if you had though, it’s been absolutely ages since I blogged or made regular YouTube videos. Not for lack of creating, but because I have only had the energy to do the bare minimum to get my work done and then it’s been back to trying to stay afloat. Mentally, physically and emotionally I felt like I was being ground down by life and lots of things that happened one after the other in the last couple of years. In all honesty, 2023 nearly finished me off and it all became too much. Something had to go, and the blogging and video editing was the first to give.

As my mental and physical health declined rapidly, I had little choice but to take stock of what’s important and make some serious changes to my life style and the choices I make for the sake of my health and sanity (or what was left of it at that point)

These two photos are taken about a year apart, the one on the left in 2023 and the one on the right in 2024. While I am well aware that the lighting in way better in the photo on the right, I can still see a huge difference in myself. Maybe because I also know how much of a front I was putting on in the photo on the left. The smile doesn’t reach the eyes, and the smile itself is a bit forced and not quite right. In the photo from this year I look so much more relaxed and at peace, which is huge. There is also a weight difference of around 17kg/38lbs in the photos.

How did I achieve this massive difference in just one year, while struggling you might ask? It started small with implementing a few good habits to do for myself every day, the first one was as simple as brushing and flossing my teeth every day. You might think that’s silly, everyone does that every day, but when you are tired to the point of exhaustion and nothing really matters, you don’t always do that.
I wear a wellness tracker ring day and night, called OURA, and while I have had it for years, I really started paying attention to the data it presented me with every morning. How well had my body recovered and rested during the night? On days when it said I was not well-recovered, I took it easy and it was easier listening to this than my actual body for some reason. If you want to try this ring out for yourself, you can take 40 Euros off your ring with this referral code (it’s only valid for 5 referrals so if you want to try it out, don’t wait around too long)
On top of reading and evaluating the data I also started inputting notes and tags on almost every day. Almost like a diary, and being perimenopausal it helped a lot understanding why my rage was to high some days and why some days I could take just about anything the universe threw my way. It was so helpful, and also a bit validating knowing that sometimes I had very little control over what my own body did to me and my mood. Having said that, this perimenopause stuff? It is hard AF.
I started looking around for advice on what to do and how to cope, and came across a OBGYN on Instagram called Dr Mary Claire Haver who’s made it her life’s mission to help women get through perimenopause and menopause with as much support and help as possible. I also came across Michelle Leframboise who has done the same thing, only focusing on fitness and wellness. She recently launched The MenoFit Method which is a wellness program focused on women hitting perimenopause, with lots of great advice on how to avoid injuries (because perimenopause doesn’t suck enough on its own, but we are more likely to get injured and take longer to heal)

Going for walks with my little girl gang made a huge impact on my mental health as well, it really can not be underestimated what a wonderful effect nature and pets have on your mood.

It does help that I live in a really stunning area. Seeing these views every day is like a balm to my soul, it really is. Speaking of the Cheeky Chicas, we mustn’t forget Tiny Tina. It’s rapidly coming up to her 1 year anniversary being part of the girl gang!!


I added in a simple face wash and skin care routine as a little self care at the end of each day, and when that was easy, I started do to a little morning self care routine too.
I love products from The Inkey List, especially their hyaluronic acid cleanser, hyaluronic acid serum and SPF. It’s one of the few that doesn’t make my eyes sting.

To help my sleep, which was atrocious, I started listening to a sleep mediation thought the Oura app every night . When that started to help me feel more rested, I set an alarm to get up around the same time every day. Intermittent fasting also helped with my sleep quality, and it even helped with the routine of eating at more regular hours.

A bit later I added a shower each night where I used scrub gloves from The Body Shop to get my blood flow going and help my lymphatic system flush out whatever toxins and rubbish I had built up in my system. Getting rid of dead skin cells and moisturising every day is also a nice mental cleanse as well as a physical one.


As I could feel the difference a sleep mediation made for me, I added in a morning meditation into my routine. When the weather is nice I do this outside to get some sunshine and vitamin D.

The biggest, and most important thing I did for myself though, and I can not over emphasise this enough, was rewiring my thinking from ‘why can’t I do better’ to ‘I’m doing the best I can and that is enough, no matter what ‘my best’ looks like on a day to day basis’. Being kind to myself in all aspects, instead of treating myself like I’m a failure or someone not worthy of putting time and effort into, I have worked so hard to embrace myself as I am and love myself. These days I feed myself like I love myself, rather than punishing myself with calorie restrictions and hardcore workouts. I have tried that and it doesn’t work for me. Not long term, not healthily and it was definitely not sustainable. I needed something that fuels me and doesn’t stress me out. I might just have found what works for me, and I’m so much happier and healthier for it.
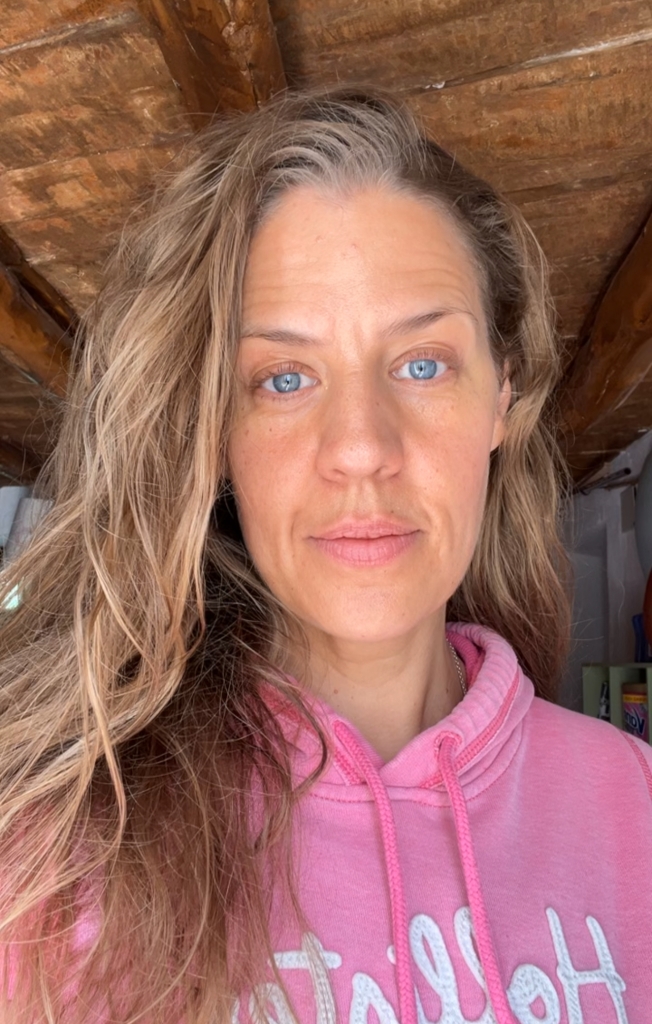
This is me, no makeup and no filter, at the age of 44, almost 45. I am feeling like I finally fit my skin if that makes sense? I have done a huge amount of work on my inner self and it feels like my inside and outside match now. It’s a remarkable and powerful feeling. I wish all women would find this feeling, and much much sooner than I did. It would be totally amazing if we could infuse girls with this feeling when they are little so they can reach their full potential sooner. I think the world would be a much better place if we could do that.

The last couple of years have also been a bit of an awakening for me, I don’t know if it’s got to do with hitting perimenopause hard, and having to realise that I’m not getting any of the gone years back. I am so ready to embrace life and live life to it’s fullest potential (bank account allowing, lol) I used to think that after 40 it’s all downhill, but I have actually found that I am more full of life now than I was in my late 30’s. The saying that women find themselves after 40 when they have no more F’s to give feels more and more like a mantra. You don’t like what I’m doing? That’s ok, I do so I’m going to keep on doing it. Life is too short to worry about what others think and how someone is going to react to you doing what is best for you, so go and do it. If it makes you happy, just do it! If that means dancing in the street when you hear a good song, do it.
I would rather regret something I did (think ‘remember that time we just packed a bag and went to the airport without a plan of where to go, just to go somewhere’), than something I didn’t do (like chase after my dreams and hopes for my life) when I’m laying on my death bed. Although if you suggest diving with sharks or something to do with heights, I’m good LOL! Those kinds of things I’m ok with “missing out on” for sure.

If you are still reading this, have a cookie! You are a star! I wasn’t lying when I said it was a bit long winded, right? It felt like it needed to come out though, so that’s why I’m sharing this. I also know that when I have shared about my struggles on social media, the outpouring of love and support as been totally overwhelming. So many people have said they feel exactly the same, they are in the same boat and it made them feel less alone hearing that someone else knows what they are going through. That’s not to say we want others to feel bad, but there is a solidarity in knowing that it’s not just me struggling to manage life, responsibilities and expectations.

Ok, so part of the whole BIG NEWS thing are a couple of things actually. I have recently joined the Altenew Design Team, and I’m very very excited about it! You can check out my first blog post as part of the DT by CLICKING ON THIS LINK.

I have also launched a new website, www.ericaabdesigns.com, where I will be sharing all sorts of stuff from now on, not just card making. It’s still a work in progress so please bear with me. When I get time and the technology knowledge pinned down, I will be adding destash boxes of crafting goodies I no longer use for various reasons, some paintings and sketches, little bits and bobs I make etc etc.

The goal is to be able to live off what I make as an artist, which I know is a long way off, but every journey starts with a single step so here I am, taking small steps towards that goal. If you want to be part of this journey with me, and maybe do it for yourself too, come along. I strongly believe that we rise quicker by helping each other out.

Next week I will also be setting off for the US for a three week trip, where I will be attending a couple of crafting expos. The first one is in Orlando April 12th until 13th, and I will actually be teaching a few classes there! Two Copic colouring ones and one doing water colouring with Karin Markers. If you want to attend, the classes are only $59 each, and are a full hour of fun and Erica-isms.

Copic Floral Mastery Class on Friday April 12th at 3pm, is the one where we will blend, blend, blend to get super smooth and gorgeous colouring on a big floral image from Crafty Meraki. I will be using the Elegance stamp, but you can bring whatever floral image you want. The bigger the better, I say!

Die-Cut Drama: Copic Colouring with a Twist! is the class where we will be adding Copic colouring to diecuts to bring them to life.

Watercolor Wonders Floral Mastery with Karin Markers is the class for you if you have the Karin Markers but haven’t quite gotten to grips with them yet, or simply want to learn how to make the most of your markers.

I really hope I will see some of you there,

With love and light, creativity and sparkle, and massive hugs for still being here!

Erica


YouTube Hopping with Alex Syberia Designs | Video and giveaway!

Hi and welcome back to my blog!

Today’s post is just a quick one, as I am hopping again but this time over on YouTube. The Alex Syberia Designs team and friends are showing off the You Are Loved collection, the October release. All throughout this post you will find compensated affiliate links, which means that if you click on them and buy something, I will get a small commission from the company directly as a thank you for directing you to them. The earnings I get from these links help me pay for things like blog and website hosting, equipment and behind the scenes stuff. Thank you so much for the support, it really does mean the world to me.

If you want to skip to checking out the video right away you can CLICK THIS LINK or click on the thumbnail down below.

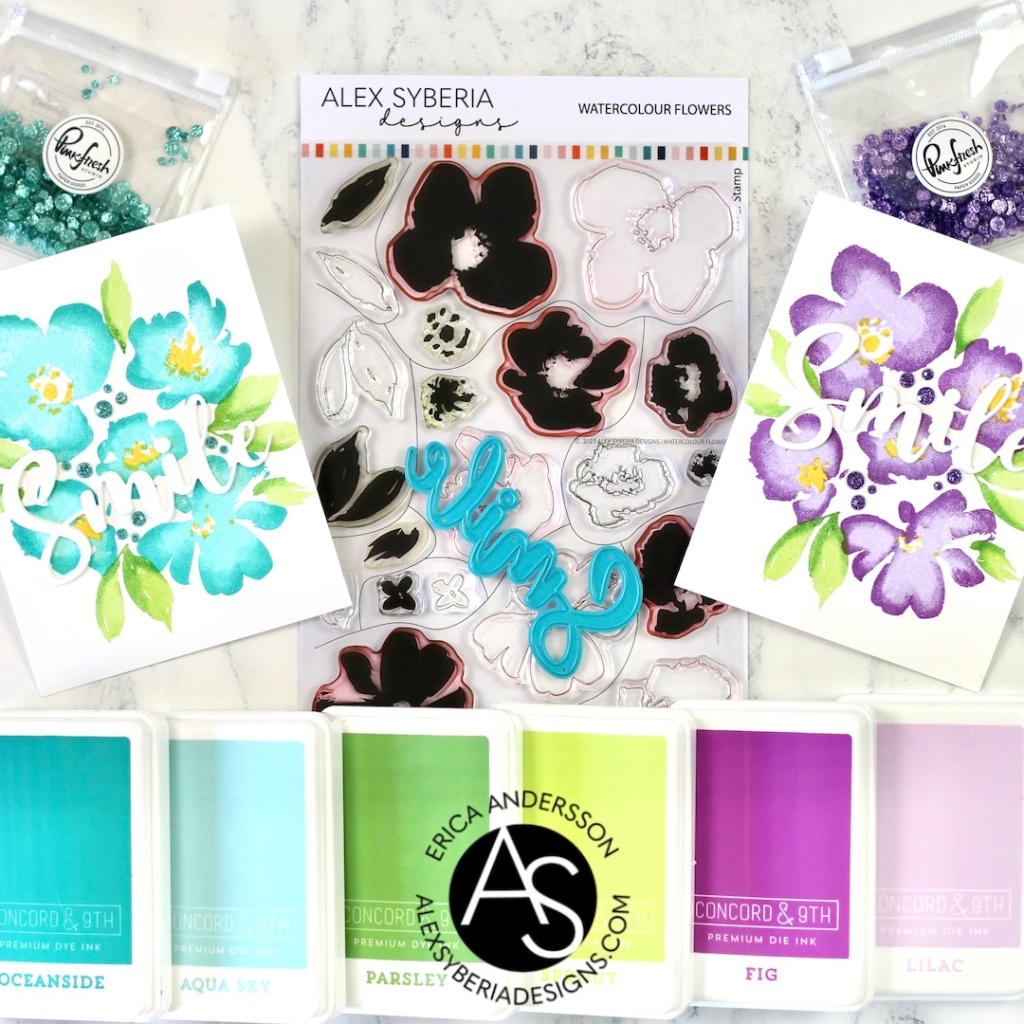
I love this beautiful Watercolour Flowers set, as you might have noticed from the number of cards I have made with it. I also adore the Large Smile diecut.

I used the brilliant Stampwheel from Altenew for both of these and it was just a breeze! I’m so impressed with it, and I can’t wait to keep playing with it to discover more and more ways to use it.

The first card is made with Aqua Sky and Oceanside for the flowers, and Sprout and Parsley for the leaves. I love this colour scheme, and those little pops of yellow (Buttercup ink) really bring the whole thing together.

I think this layout would work with many kinds of word diecuts, and sentiments, and occasions. This Large Smile word diecut is adorable, that font is beautiful and I think the Aqua Glitter Drops from Pinkfresh Studio were the icing on the card.

The second card was a bit more of a wild card colour wise, as purple is not one of my favourite colours. I don’t mind it on flowers though, and Lilac and Fig look stunning together!

On the purple card I used Amethyst Glitter Drops, and they look even better than the Aqua combo!

If you want to see how I achieved those details on the petals and leaves make sure to check out the YouTube video. If you want to be in with a chance to win one of FIVE £15 gift cards, make sure to leave a comment on the video, and for more chances leave comments on the rest of the stops too. You have until Oct 22nd to leave comments, and the winners will be announced on the Alex Syberia Designs Giveaway Winner Announcement page on Oct 23rd.

That’s it from me for today, thank you so much for stopping by! Lots of love and happy crafting from Erica

Alex Syberia Designs You Are Loved Release Blog Hop & Giveaway

Hi and welcome back to my blog!

Today I’m hopping along with the Alex Syberia Designs team and friends to celebrate the October release called You Are Loved. You should have come here from Emelie, and the next stop on the hop is Hannelie, but no matter how you ended up here, HI! There will be lots and lots of inspiration from everyone and of course there is a fabulous giveaway too:

Alex Syberia Designs is giving away a £85 ($100) gift certificate to 1 lucky winner and a £15 ($18) gift card to 5 winners. 

Open internationally. All 6 winners will be drawn from the entrants that have played along with this Blog hop by midnight BST October 22nd, 2023. Winners will be announced on the Alex Syberia Designs blog ‘Giveaway Winners’ page on October 23rd, 2023.

Blog Hop Order:
Alex Syberia Designs
Amanda
Amy
Arjita
Bobbi
Brenda
Carly
Emelie
Erica
Hannelie
Lien
Nicoletta
Sandi
Sylvie
Virginia

For my cards I have mainly used the dreamy Watercolor Flowers set, sprinkled with some other goodies. I completely surprised myself by being relatively non-stressed about the level of a white space on them! Normally I find it really difficult to leave so much unused card space white but with this set it was so easy!

I used the Stampwheel from Altenew to stamp the leaves in a perfect circle on a card base, using luscious Concord & 9th inks in Sprout, Parsley and Avocado.

The flowers are stamped with Dragonfruit ink, also C&9, and then the middle with Sunshine from Pinkfresh Studio. These I cut out using the coordinating diecuts, and then arranged on top of the leaf wreath.

To finish the card off I heatembossed a few sentiments from the Self-Care Sentiments stamp set, in Rich Gold because it’s my favorite. These are also cut out with the coordinating diecut. The final touch was adding a few matte gold embellishments, and these are the Matte Metallic Pearls from Pinkfresh Studio.

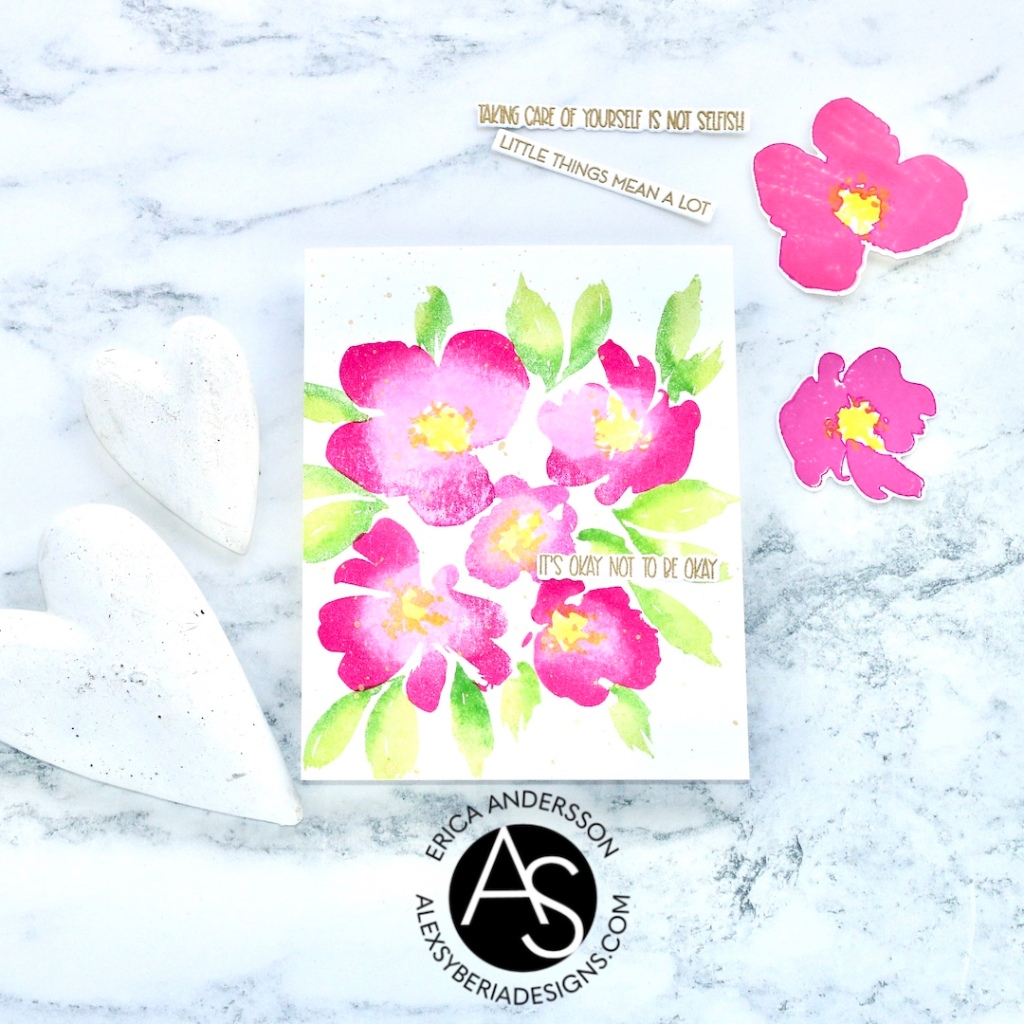
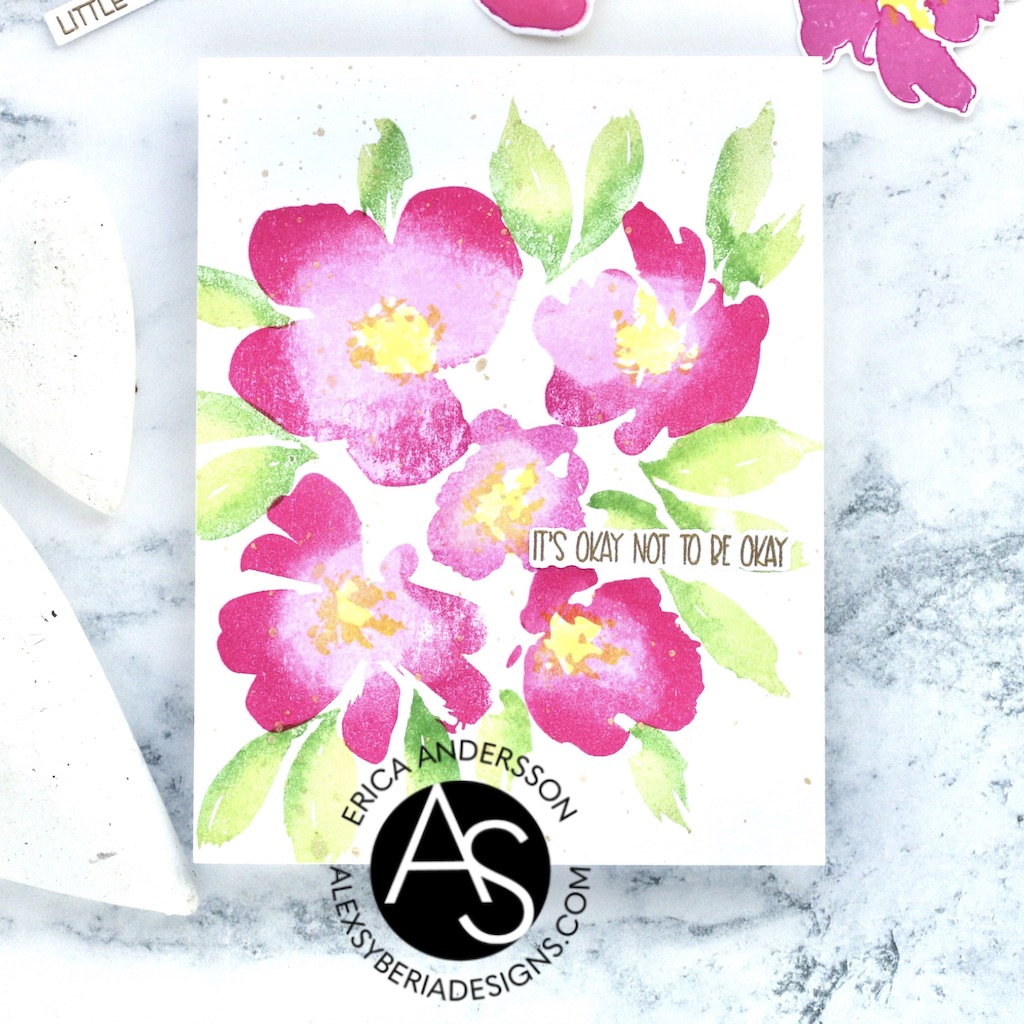
My second card is done with much of the same things, minus the bling, surprise, surprise. This time I started out by stamping the solid flower stamps in shades of pink, onto a card base, also with the Stampwheel. It’s very clear that Altenew put a lot of thought and effort into this tool, it’s absolutely brilliant!

Around and between the flowers I stamped the leaves, again in Sprout and Parsley inks. I used Itty Bitty blender brushes from The Rabbit Hole Designs to add the darker colours to the images to avoid harsh ink lines. I did the same for the pink flowers which are done in Sweet Pea and Dragonfruit.

This panel has been splattered with some light gold watercolour for shimmer, but that’s all the “bling” added to it, if you can believe it.

The sentiment is also from the Self-Care Sentiment set, it’s one of the ones I heat embossed in one go for the first card and I really like this one. I’ve just had a slower month to take more time to focus on my health, both physical and mental health, so this one spoke to me.

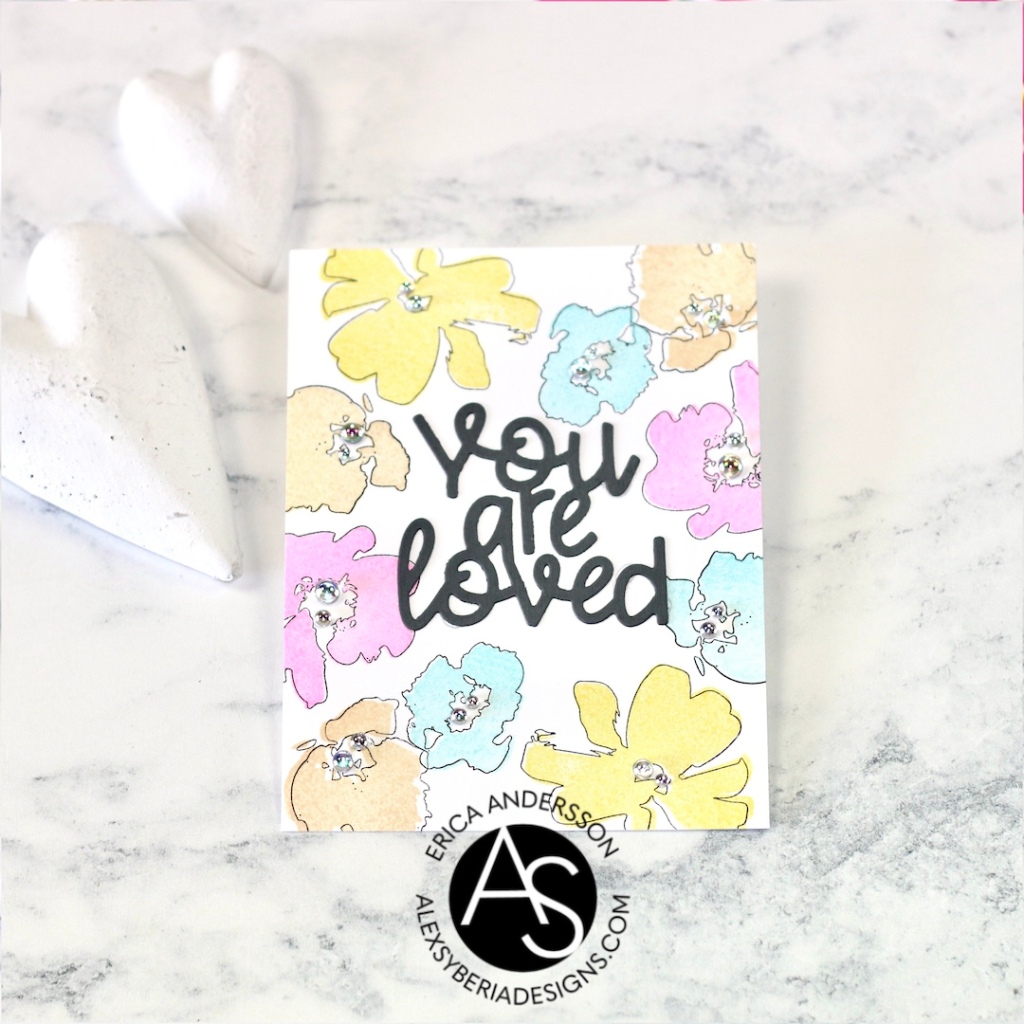
My final card is super simple. I stamped the solid flower images from the Watercolour Flowers set in pastel colours on a card base, and then framed them with the outline stamps in black. The finished look is graphic and quite cool!

This card is topped with one of the new sentiment diecuts, You Are Loved, and I cut it out of linen textured grey cardstock.

On this card I added lots of bling in the middle of the flowers instead of stamping it. These beauties are Clear Drops Iridescent, and are also from Pinkfresh Studio.

With that, I’m all done but don’t forget to check out the rest of the blog hop and make sure to leave comments on the Alex Syberia blog post as well as along the stops for lots of entires into the giveaway! The next stop on the hop is Hannelie and the full hop list can be found on the Alex Syberia blog post in case there are any broken links, as well as at the top of this post.

Lots of love and happy crafting from Erica

You can find me on various social media platforms, by clicking the links below.
My blog
Instagram
My YouTube channel
CaCaCraft on Facebook

Alex Syberia October Card Challenge | Heat embossing!

Hi!

Today’s post is a short, sweet and to the point one as I have A VIDEO up on the Alex Syberia Designs YouTube channel. I’m posting here in case you were not aware they have a channel, you never know what people know about and not, you know? Lots of ‘know’s in that one sentence, lol!

Anyway, each month Alex Syberia Design is running a card making challenge, there will be a theme and a colour mood board to get your creative mojo in the mood for some fun makings. You can win a  £20 gift card if you are the winner! You can enter up to three projects each month to increase your chances of winning. Remember to link up your projects to the inLinkz link in the challenge post as those are the only ones who will count.

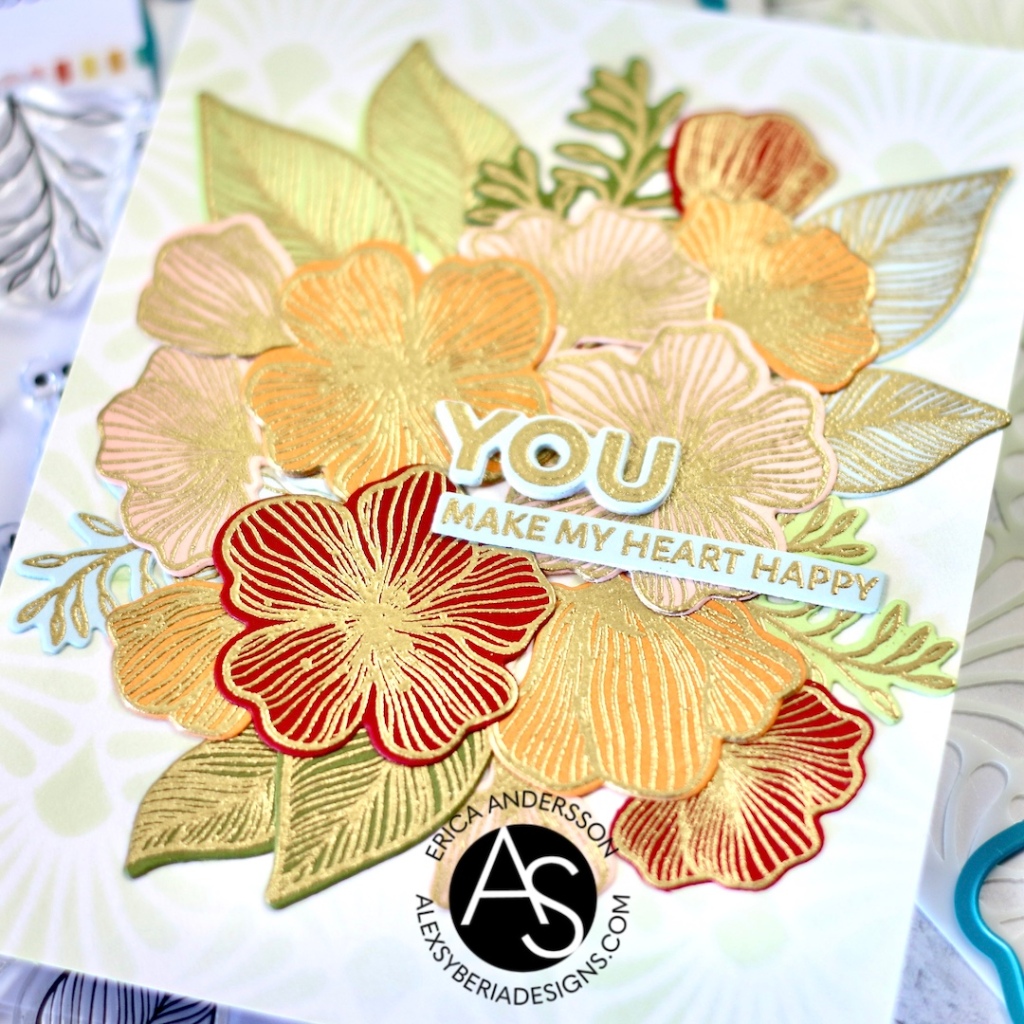
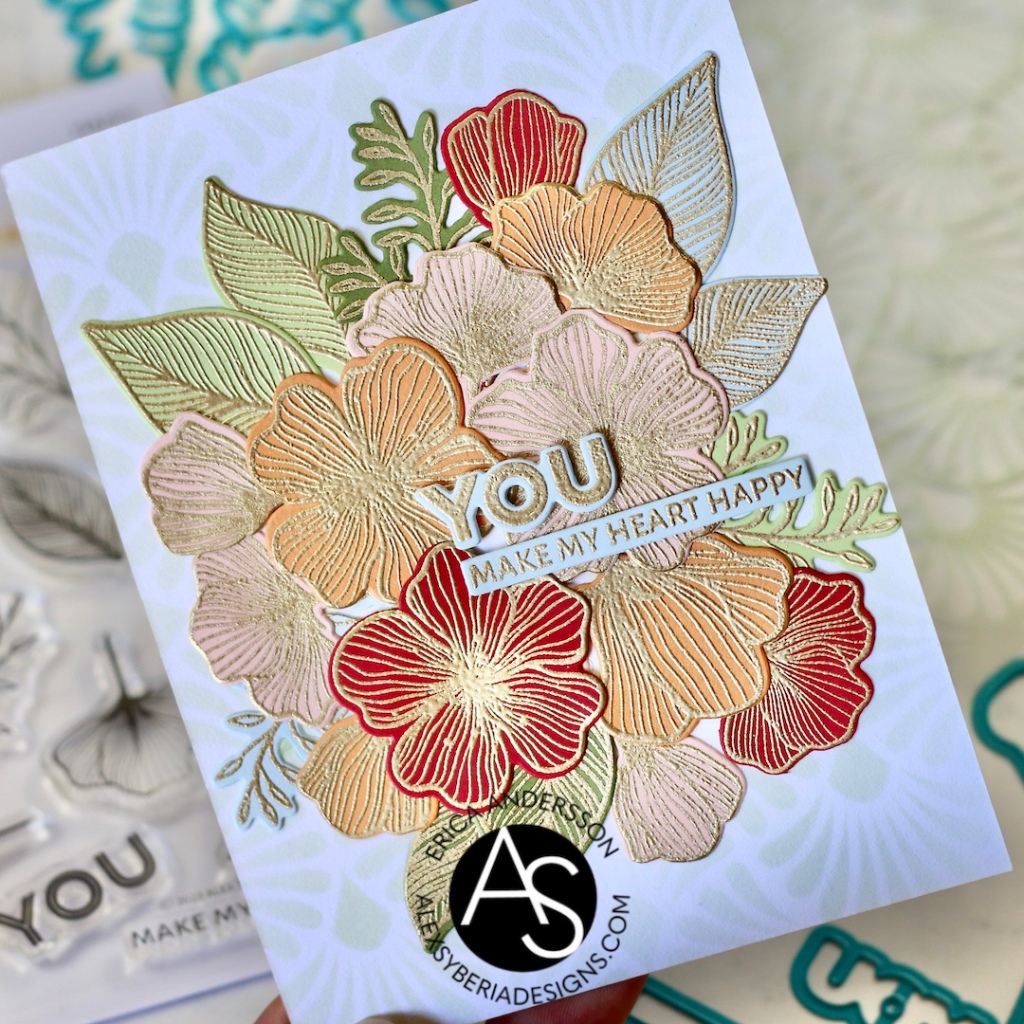
I used the full six colours in the mood board as well as the embossing theme, and this was the card I came up with! All the card stock are from Concord & 9th, and I have used Nectar, Clementine, Cranberry, Harbour, Sprout and Artichoke. In the video you can also see the glorious card stock swatch I made with all the colours of the card stock, and the super handy Swatchbook Diecut and Swatchbook Stamps. You can also get these in a bundle.

This stamp set, Happy Blooms, has coordinating diecuts too, which makes life much easier. Especially if like me, you do not enjoy fussy cutting. The ‘you’ part of the sentiment is also layered with two extra pieces for extra dimension.

Does that Rich Gold embossing not look absolutely lush? This card stock is fab for heat embossing, as it’s nice and smooth. I did also treat it with my Cottontail Embossing Tool from The Rabbit Hole Designs before stamping the images with the Embossing Ink. I always use a MISTI when I stamp anything, and for heat embossing it’s no different. I usually do at least two stamps before adding the embossing powder.

In the video you will also see me using the Press’n’Seal trick after arranging all the flowers and leaves on the card base, which has a very light ink blending pattern on it. This is the Purelands Fan stencil, and it gave just enough interest to the background without overpowering it.

I hope you get a chance to check out the video, and I would love it if you left me a comment and a thumbs up too!

Lots of love and happy crafting from Erica
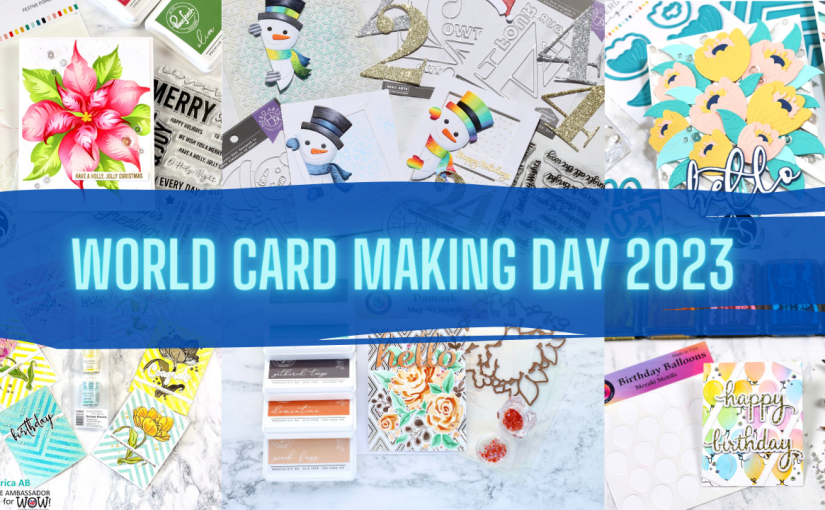
World Card Making Day 2023 + Deals and steals!

Hi and happy World Card Making Day!!

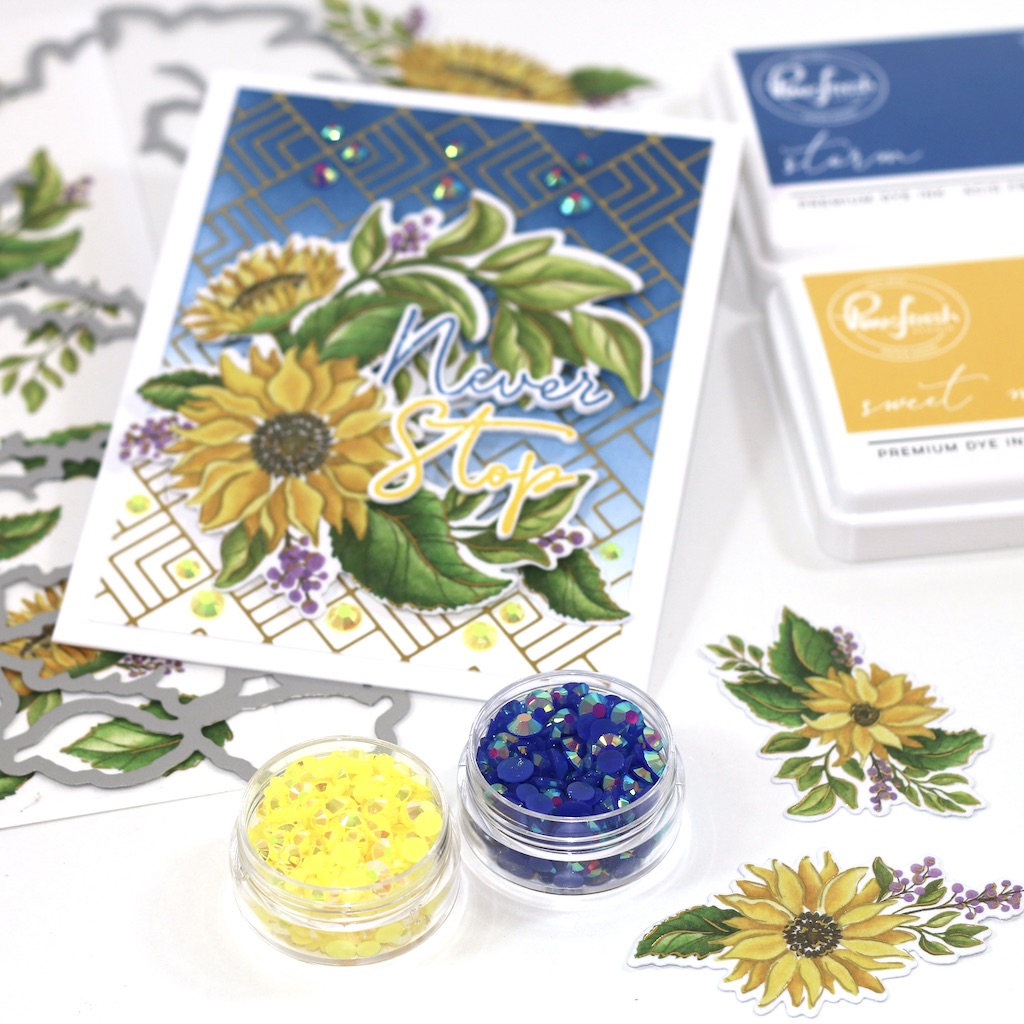
This was just before sunrise the other day, and I had to share it as it’s so stunning!

I hope you are doing well and finding time to craft a bit today. I have a few cards and deals to share with you, in case you need some inspiration or feel like treating yourself. In all of my blog posts you will find compensated affiliate links to most of the products I use, and if you shop with these links I get a small commission from the company directly as a thank you for sending you their way. This is one of the ways I earn a little bit of money that helps with costs like blog hosting, website, equipment, and all the behind-the-scenes cost like photo backgrounds, camera, and essentials like glue and paper. If you use these links, I can not thank you enough because every little helps and I appreciate it the support and encouragement so much!

With that in mind I’m sharing a few deals that are available right now, like 40% off at Alex Syberia Designs!

Here is a little bit of inspiration from Alex Syberia, using Birthday & Wishes word diecuts, Happy Blooms stamp and coordinating diecuts, Dazzling Fireworks Coverplate and Congrats & Hooray word diecuts. The card at the bottom is made with the stunning Angel Bells set. It comes with a stamp set, a coordinating diecut, layering stencils and a hot foil plate!

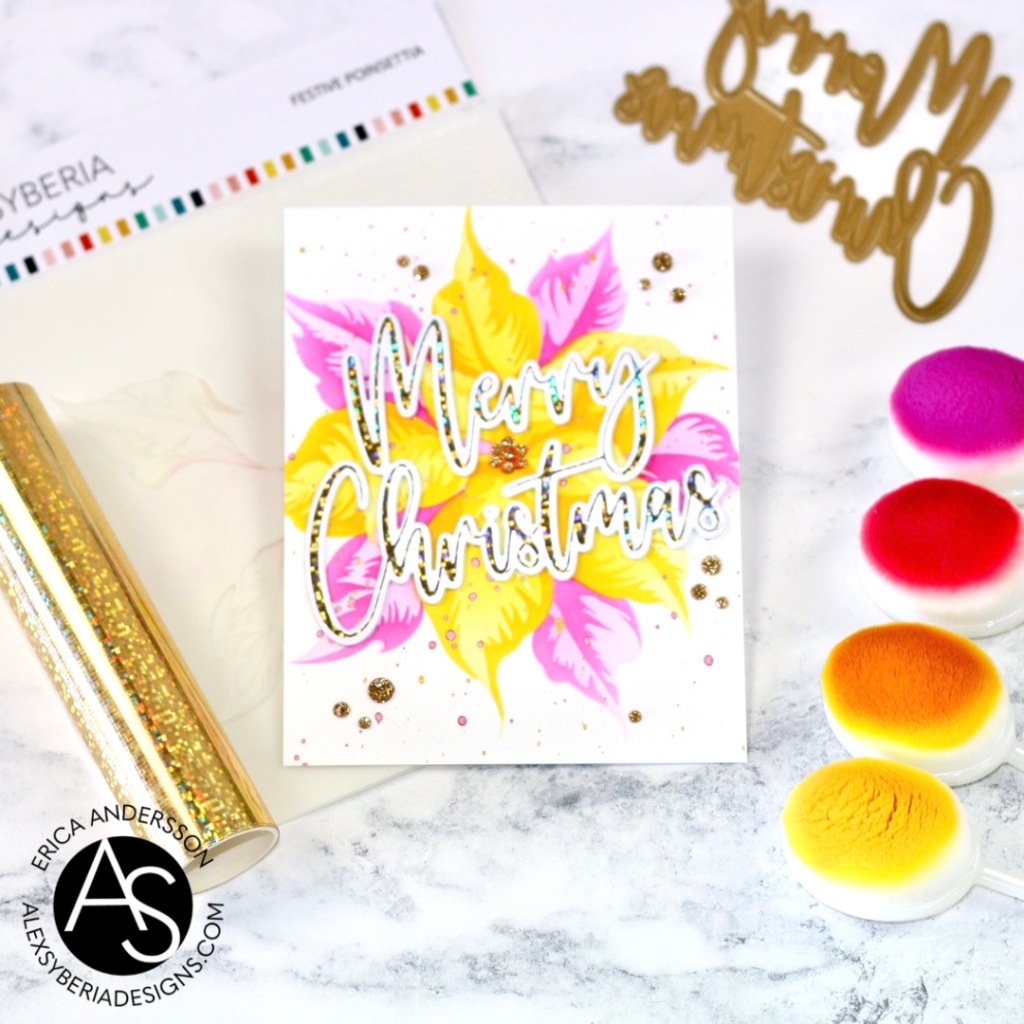
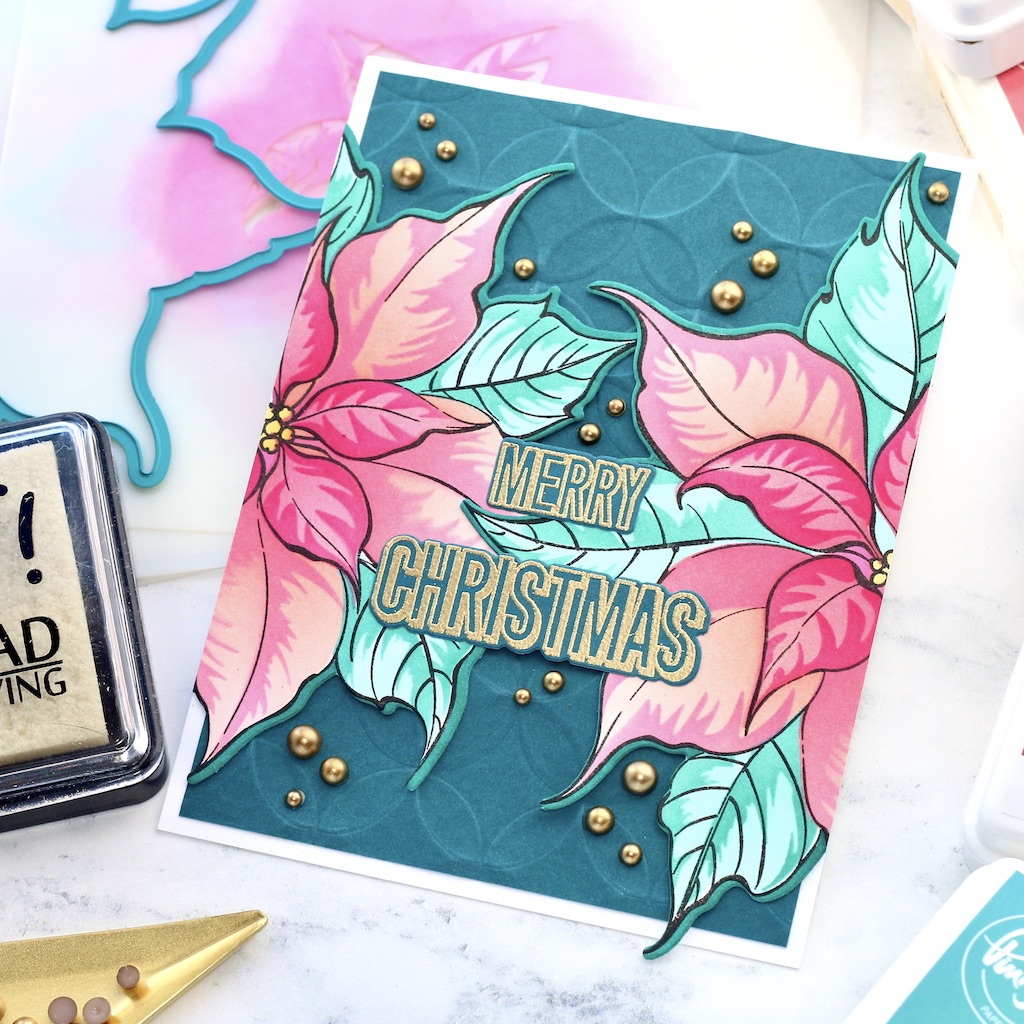
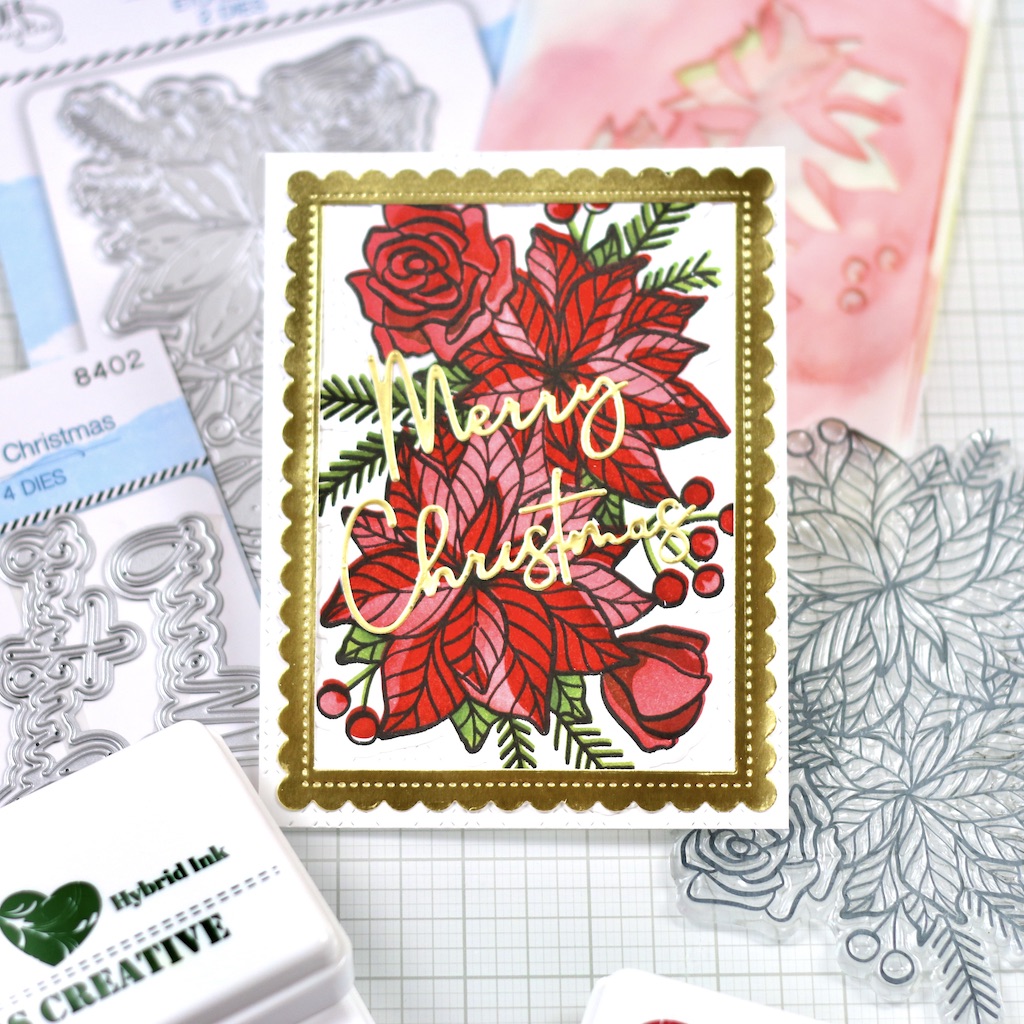
One of my absolutely FAVOURITE sets from Alex Syberia Designs is the Festive Poinsettia set. I have used it for so many projects and I can say without hesitation that I would have bought this instantly if I had not been sent it as part of my design team commitments. It’s STUNNING!!!

It looks amazing in traditional colours as well as some more outlandish and dramatic combos! I actually think that it works perfectly without the coordinating stamp too, just the layering stencils alone gives brilliant results.

For this one I used the outline stamp after doing the ink blending, and then used the coordinating diecut to cut the whole thing out. The sentiment is from the stamp set and is heat embossed in Rich Gold embossing powder.

All ink colours used can be seen in the photo and are all from Pinkfresh Studio, as are the matte gold pearls. I love these!

My Pinkfresh inks are definitely the ones I reach for the most, it’s so handy that they come in four shades of each colour. It makes it a breeze when using layering stencils because you don’t really have to think about what colours will work.

They have also just released some additional inks to the 48 ink colours they already have, and I can not wait to add these to my collection.

Over at Pinkfresh you can also grab some fabulous washi tapes and coordinating products at 30% off with the code WASHI30, at checkout. The washis can not be beaten for speed when it comes to card making, they are brilliant. Not to mention that they are stunning.

There is also a great saver over at InkOn3, which is the inventor of the original Fadeout Ink. You can save over $30 on the Fall Card Kit bundle. No code necessary at all. They also have the most amazing Stamp Cleaner! I use mine all the time and it cleans stamps, tools and work surfaces so good!

At Honey Bee Stamps you can take 20%c off your whole cart with the code WCMD23, so this is the chance to grab one of those fabulous sentiment sets or flower diecuts!

As it’s October, there is also a new My Monthly Hero kit from Hero Arts. You can pick from the Classic Kit or the Premium Kit, as shown below. If you don’t want to miss out on these kits, you might want to consider subscribing as once they are sold out they are gone.

Recently I also finally gave up on resisting the BetterPress from Spellbinders, and I have been playing with the brand new Impress-ion products from the Fall, Winter and Holiday 2023 collection from LDRS Creative!

I didn’t know this before I got the BetterPress but you can actually hot foil with the plates!! I tried it with the Oh Christmas Tree Impress-ion as seen in the last photo and it works fab! I did have to add another shim, but this was only my second try.

If you want to grab some of these LDRS Creative products, you can treat yourself to 15% off with the code ERICAC15 at checkout.

Ok, I think that’s it for the time being… phew… lots of love and Happy World Card Making Day!!

Crafty hugs from Erica

Hero Arts & Altenew Stampwheel Collaboration Blog Hop and Amazing GIVEAWAY!

Today I’m super duper excited to be taking part in a collaboration between Hero Arts and Altenew, featuring the Stampwheel! I have had my eye on this tool since I saw a prototype of it at Creativation years ago (pre pandemic) but every time I have been trying to order it from Card Nouveau (this is where I shop the most) it’s been out of stock. When I got the chance to take part in this hop and have Altenew send me one, I JUMPED at it.

In this post you will find some compensated affiliate links to the products I have used. If you shop using these links I will get a small commission from the company directly, at absolutely no extra cost to you. The earnings from these links help me pay for things like blog hosting, website, tools and equipment for the behind the scenes. Thank you so much if you chose to support me by shopping with these links. I appreciate it more than you will ever know!

You can find all the information about the giveaway and the Stampwheel, over on the Altenew Card Blog. The full lineup for the blog hop can also be found in that blog post, but you should have come here from the amazing Svitlana Shayevich and the next stop is my in-real-life friend Karen Boyce! You can also click on this inLinkz link and see the full lineup.

The giveaway is insane, there are $400 worth of prizes! Altenew is giving away FOUR $50 gift certificates and Hero Arts is giving away TWO $100 gift certificates! All you have to do is leave a comment on the Altenew Card Blog post, and for extra entries leave comments on each stop on the hop too. The six winners will be drawn from the comments and the winners will be announced on October 6th 2023 over on the Altenew Winners Page.

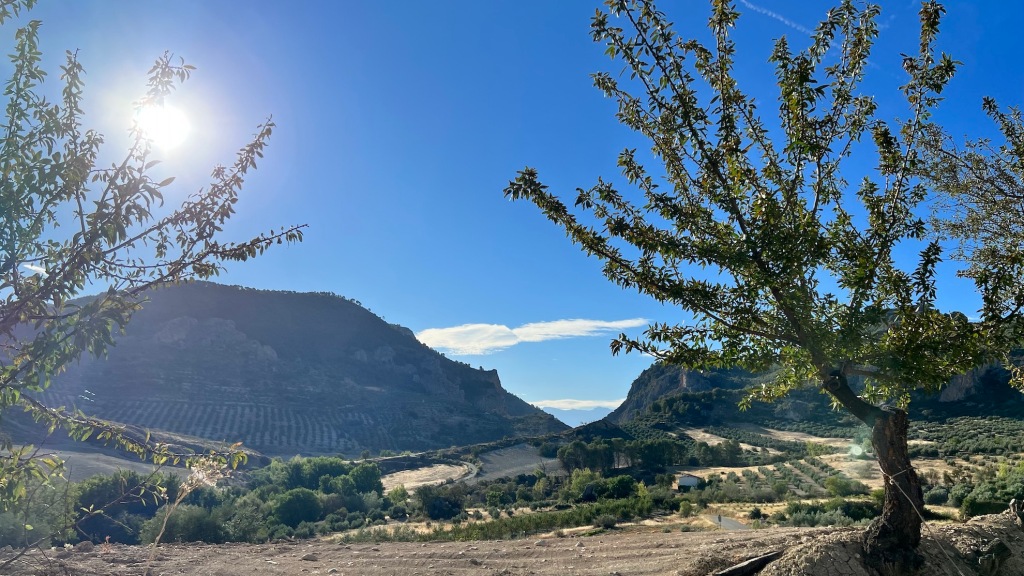
Now for my card! If you follow me on Instagram you might already know that I live in the south of Spain, right at the top of a mountain and we are surrounded by olive and almond groves as far as the eye can see.

It’s crazy beautiful around here and I’m amazed every single day still, despite almost living here for a whole year. I love walking thought the olive groves with my little girl gang, it’s done wonders for my head space and mental health after struggling really badly especially over the summer.

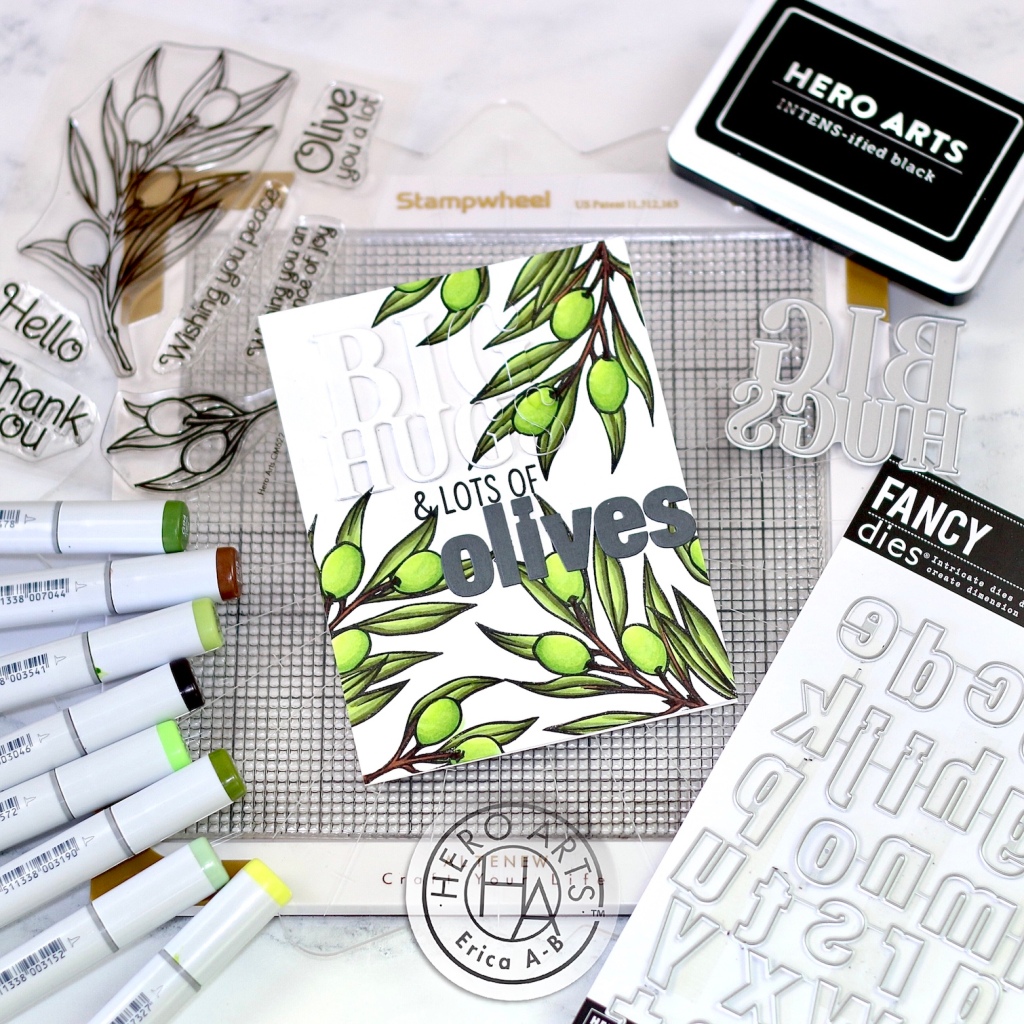
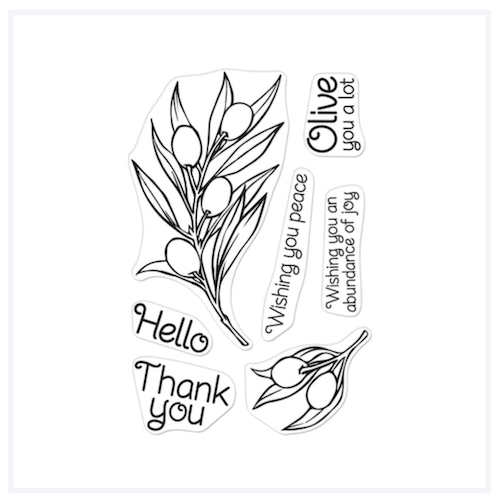
You might wonder what’s up with the chit-chat about olives, but there is a reason, I promise! I decided use the Olive Branch stamp set, and with the help of the fabulous Stampwheel and some Inktense black ink, I stamped an olive wreath on a card base. Man, this tool is so cool. I really do love and depend on my MISTI, but this is next level.

The olive branches I coloured in with Copics, in similar colours to the photo of the actual olives in my photo. One thing I wish I would have done after finishing the colouring, is stamp the images again with black ink to make the lines nice and sharp.

I love a bit of a word play, so I decided to mix a word diecut with coordinating stamp set and change the saying ‘big hugs and lots of kisses’ to ‘big hugs and lots of olives’. So corny, right? But funny too, right? The Man didn’t get it at first, but when I explained it, he still thought I am nuts but found it funny too.

That Big Hugs diecut is one of my Hero Arts faves, and who doesn’t like an alphabet diecut set? They are so versatile and makes you able to write whatever you want. Even corny things like I did here. This one is the Luggage Lowercase Alphabet diecuts.

Right, I have jibber-jabbered on long enough, I will let you hop along and see everyone else’s creation. The next stop on the hop is my crafty friend Svitlana, and I’m 100% sure she will knock your socks off!

Thank you so much for stopping by today, I hope you found some inspiration here and will follow along these crazy crafting shenanigans I have got going on on top of this mountain on mine.

If you click on any of the images below, they will take you to the products they are showing, both from Hero Arts and Altenew. Please note that these are also affiliate links.

With that, I really am done! Lots of love and happy crafting from Erica
Alex Syberia Designs One-Year Anniversary Release Blog Hop | Giveaway | Over £800 ($1000) in prizes

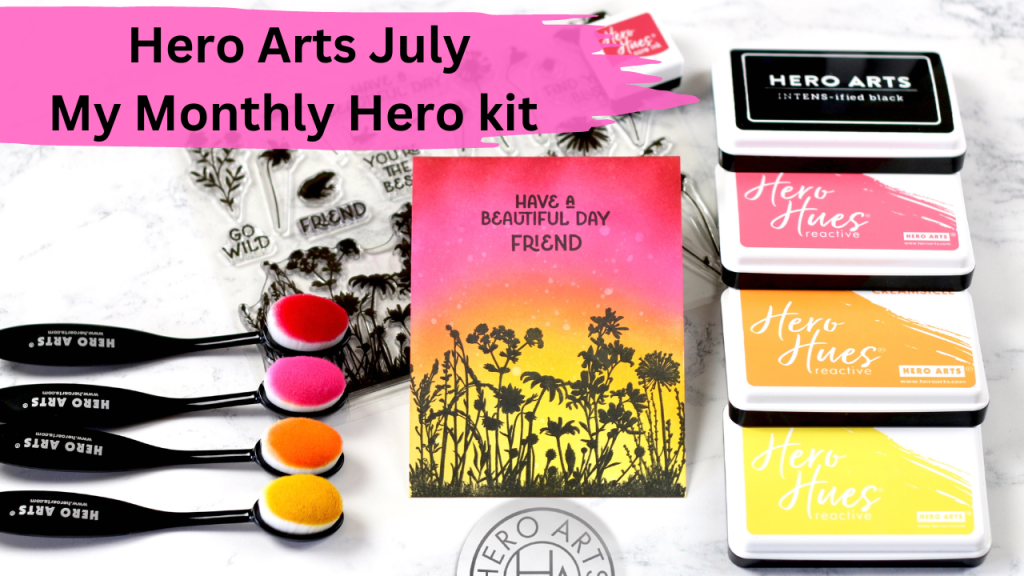
Hi and welcome to one of the stops on the amazing anniversary blog hop celebrating Alex Syberia Designs first, of many I’m sure, anniversaries!!

There is of course a massive giveaway to celebrate, you are not going to want to miss it!

Giveaway info:

To celebrate their birthday, Alex Syberia Designs has collaborated with a ton of wonderful sponsors to give away a grand total of £800 ($1000) in prizes!

Alex Syberia Designs: 5x £40 ($50) Gift Cards
Altenew : $50 Gift Card
Auzz Trinklets n crafts : $30AUD Gift Card
Crafty Purple Frog: £25 Gift Card
Dies to Die For : £25 Gift Card
Doeading : 50€ Gift Card (only for EU)
Gina K  : $100 Gift Card
Glitter and ink : $50 CAD Gift Card (only for Canada)
Jennifer McGuire Ink : 1 Share Handmade Kindness goodies bag -$75value
Kit & Clowder : $15 Gift Card
Mennys Bastelshop : 2x 20€ Gift Cards (EU)
Online Card Classes : 3 x free spots to any classes
Paper & i : $25 Gift Card (only for USA)
Pear Blossom press : $25 Gift Card
Scrap Shotz : $25 CAD Gift Card (only for Canada)
Seize the stamp : 2x CHF 25 Gift Cards
Simon Says Stamp : $100 Gift Card
SCT Magazine : $50 Gift Card
The Glitter Hubb : $25 CAD Gift Card
WOW Embossing : 2x $25 Gift Cards

Be sure to leave comments by midnight BST (London, UK time) on September 17th, 2023, for a chance to win!

Start your comment by telling us where you’re from (USA, Canada, Europe, or Australia) and what your favorite product is from this September Anniversary release.

All the winners will be chosen at random from the comments left on any of the posts in the blog hop, upcoming YouTube hop, and the three upcoming Instagram hops. Winners will be announced on the Alex Syberia Designs GIVEAWAY WINNERS PAGE on September 18th, 2023.

Make sure to come back and check if you are a winner! Prizes not claimed within two weeks will be forfeited.

To increase your chances of winning, be sure to comment on this blog hop, the upcoming Anniversary Video Hop that starts on the 9th of Sep on Alex Syberia Designs YT Channel, and the three consecutive Instagram Hops on Alex Syberia Designs Instagram starting on the 11th of September.

BLOG HOP ORDER:
Alex Syberia Designs
Emelie
Colleen
Anna
Amanda
Bobbi
Erica
Raquel
Emily
Erin
Nicoletta
Tiffany
Jo
Sylvie
Therese
Mindy
Brenda
Karin
Rachel
Sandi
Lien
Bonnie
Michelle

With all the important stuff out of the way and covered, let’s get to some of the card making. I have made so many cards with this release, but as this is a hop I will keep is somewhat short and sweet.

I love a good cover plate and the new Dazzling Fireworks gave me a ton of ideas right away. My first idea was to make an alcohol ink background and then use the cover plate on this, so I did just that. Super fun and easy!

I decorated the card with some Metallic Pearls Gold from a Pinkfresh Studio, and created a sentiment with the Congrats & Hooray Die Set, and one of the sentiments from Celebrations Sentiments stamp set. This was heat embossed in Rich Gold by WOW! Embossing Powder, and cut out with the Thin Stripes Cover Die.

The Pearl alcohol inks look so cool in the light, but it’s so hard to photograph!

The second card is done with almost the same products, except that I used the Hot Foil version of the Congrats & Hooray set. I also tried something new to me, by using the Black Matte paper from Ranger Ink with the Pearl alcohol inks. The inks were dropped in the middle of the fireworks pattern from the Dazzling Fireworks Cover Plate and then blown out in a circular motion. It turned out pretty cool!!

To make this look almost like you are looking through a telescope, I used the Nested Stitched Circle Die set to cut out a circle in a white panel. I wish I had filmed the making of the background though, it was a total experiment but came out super fun.

The hot foiled Hooray is build up with a few layers, using the Hooray & Celebrate Die Cut set, and the sentiment strip has foam tape on the back to make sure it doesn’t sag. The finishing touch here were a few Clear Drops Iridescent , also from Pinkfresh Studio.

Well, that’s it from me for today but don’t forget to check out the rest of the hop and comment along the way to be entered into the giveaway!! The next stop on the hop is Raquel, and if you get lost along the hop or if any links are broken, you can find the whole lineup on the Alex Syberia blog post.

I have used some compensated affiliate links for this post, which means I get a small commission from the company it’s liked to directly, at absolutely no extra cost to you. The income I get from these links help pay for things like blog hosting, web thingy-ma-jigs, technology this-and-that and all the behind the scenes stuff. Thank you for that, I really appreciate the support!

Lots of love and happy crafting from Erica
Hero Arts Holiday Catalog Release Blog Hop

Hi and welcome back to my blog for a fun and inspirational hop!


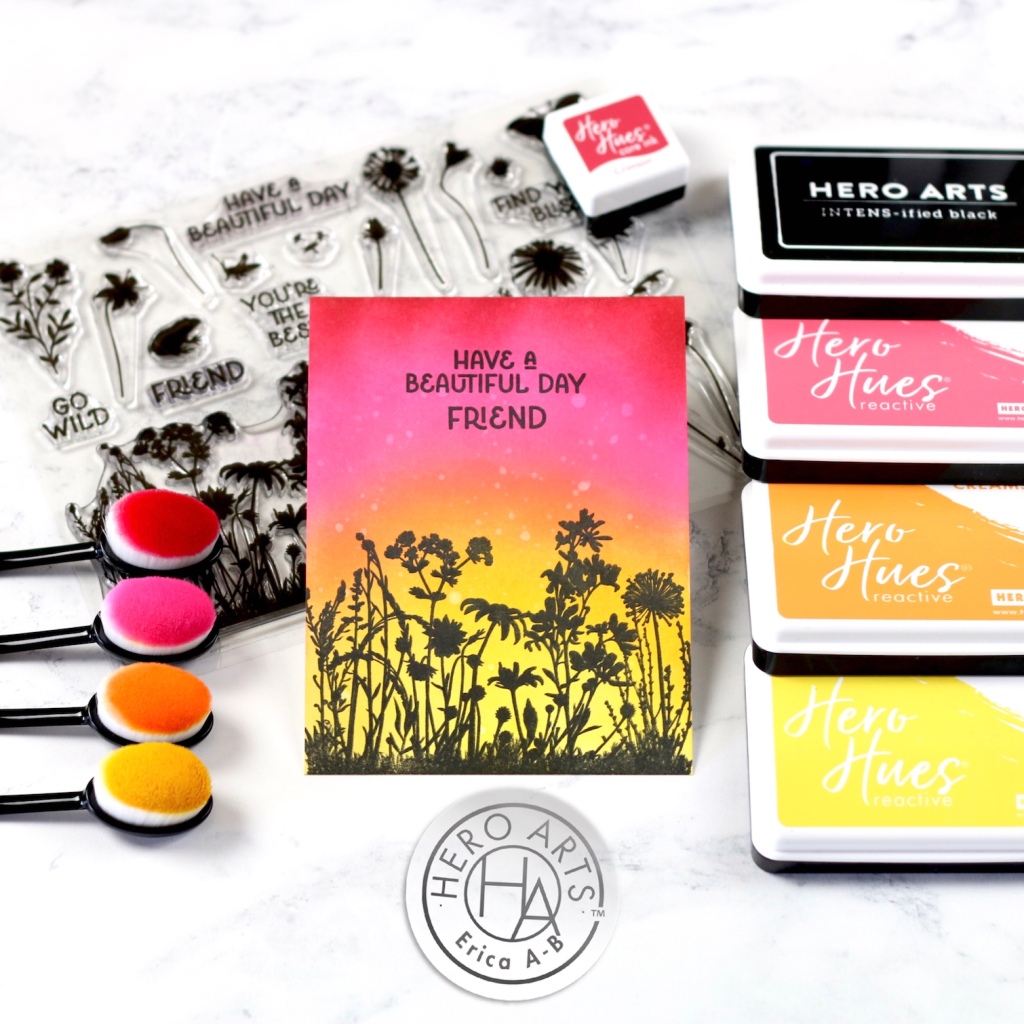
Today’s post is all about the Hero Arts 2023 Holiday Catalog release and it’s of course being celebrated with a fab hop. You can find the whole hop lineup down below, and if you leave comments on the stops along the hop, you will be entered into a giveaway for TWO $50 gift cards! You have until Thursday 31st of August, 11.59pm (I’m thinking this is Pacific time as Hero Arts is located in California)

Hero Arts

Channin Pelletier
Dana Joy
Emily Midgett
Ilina Crouse
Jessica Frost-Ballas
Lydia Fiedler
Michelle Short
Mindy Eggen
Seeka
Anna Mahtani
Arjita Singh
Erica A-B (This is me!)
Karen Boyce
Lounon
Michelle Lupton
Cathy Zielske
Daniel West
Jaycee Gaspar
Jenn Shurkus
Jennifer Kotas
Jennifer McGuire
Joan Bardee
Kelly Taylor
Laurie Willison
Meg Brooks
Nichol Spohr
Ralph Tyndall
Rebecca Keppel
Wanda Guess

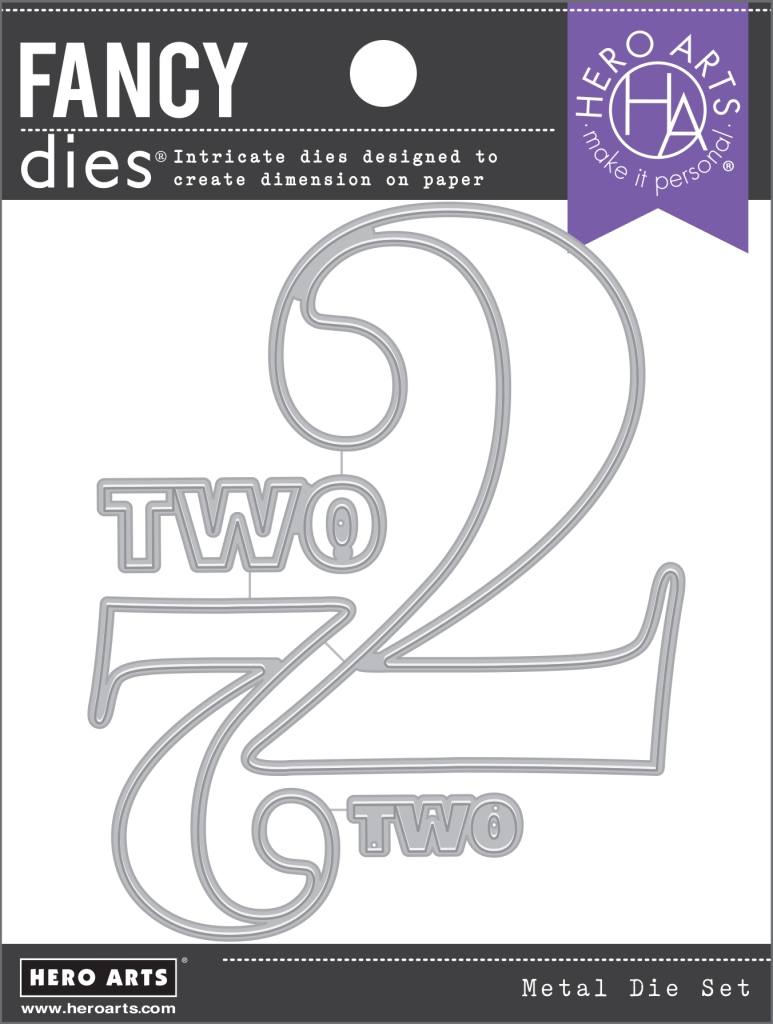
Right, so with all the important stuff out of the way, let’s get to my cards. I have used the super adorable Peeking Snowman Fancy Die, along with some of the gorgeous big number dies. As I’m Swedish, and we celebrate Christmas on the 24th of December, I have used the Number Two Fancy Die and the Number Four Fancy Dies. 

I cut out a much bigger pile of snowman diecuts than I needed really, but I was in a mood to colour so why not? The spare bits are also good in case you mess up on one, then you can keep colouring without having to cut out new pieces. 

My first snowman got a blue scarf and mittens, plus a high top hat with a matching blue band. One of my favourite blue Copic combos are the B99-B91’s, so I used those for all the blue bits.

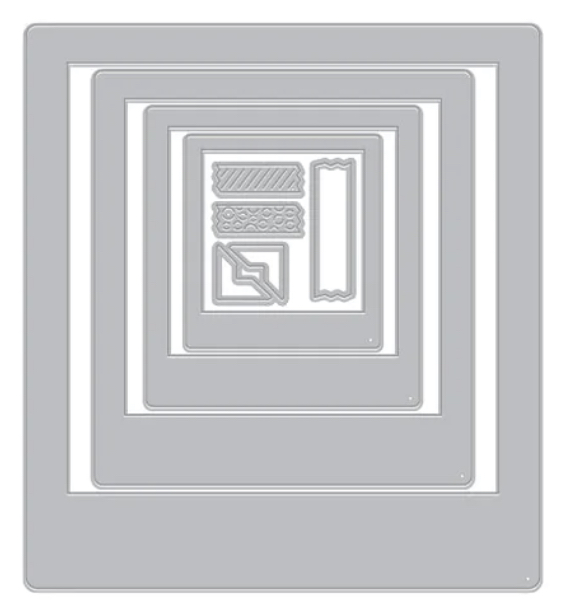
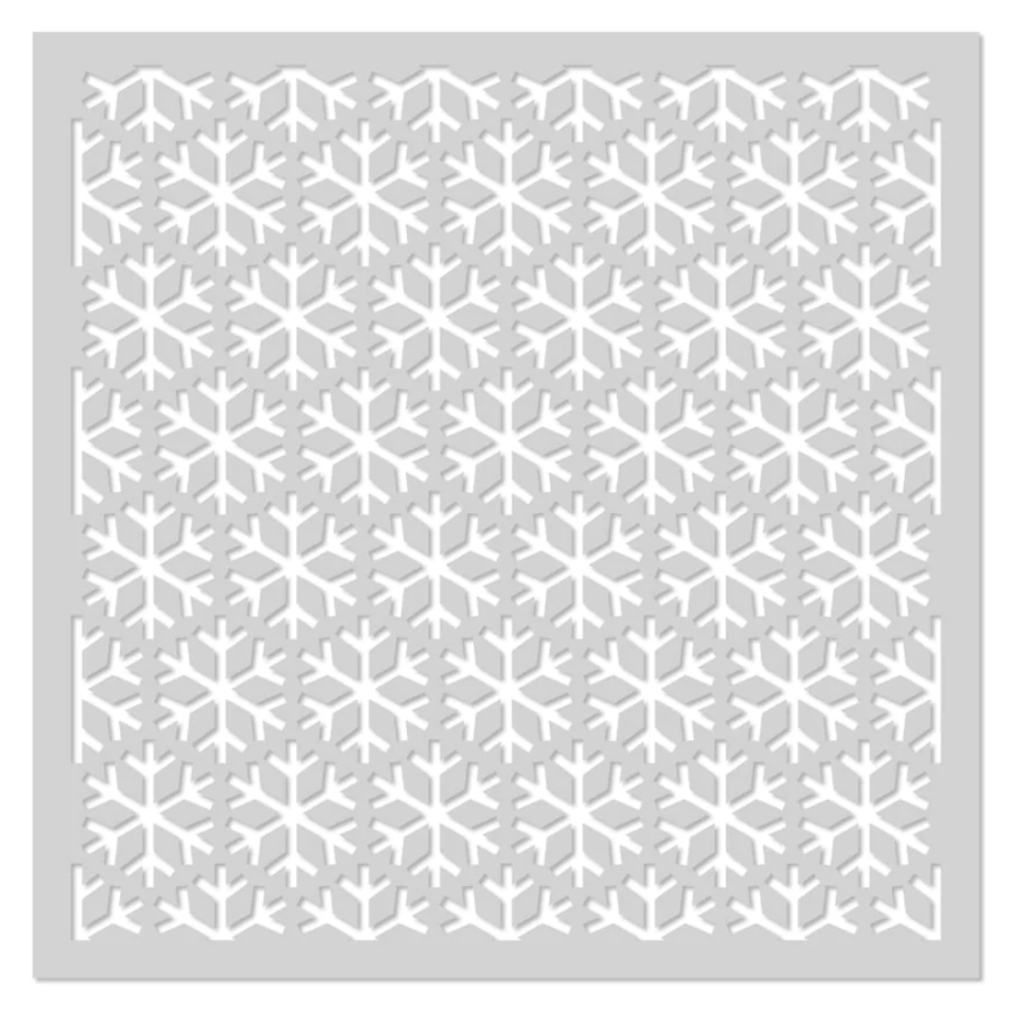
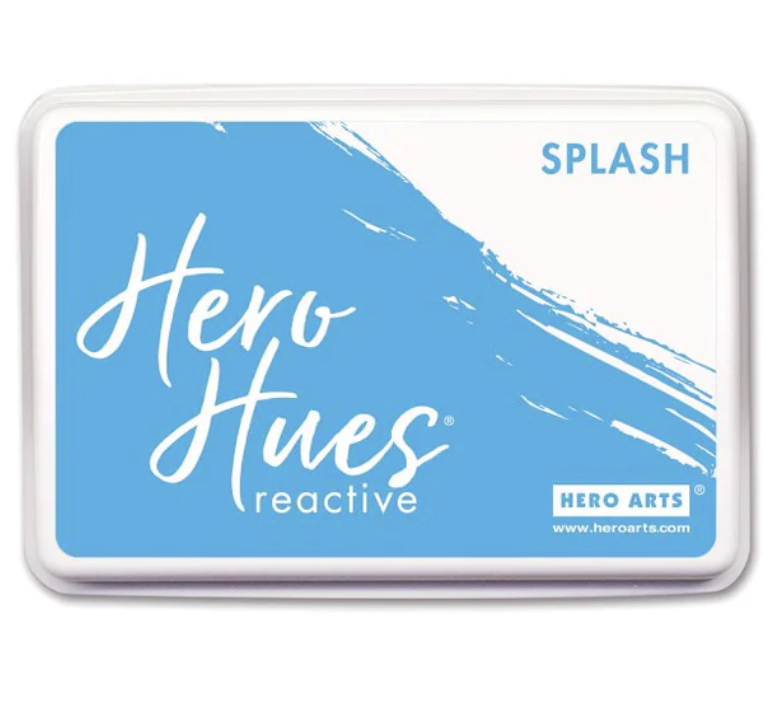
The background for this snowman is super simple, I just ink blended a little bit of Splash Reactive ink over the Snowflake Pattern Stencil, directly onto a card base. To give the snowman something to hold on to, I cut out the second biggest frame in the Journaling Photo Frame Infinity dies. These look like polaroid frames and are super cute!

The sentiment is from the Holiday Season Messages stamp set. This set comes as stand-alone stamps or as a stamp and cut bundle, if you prefer to have a coordinating diecut with your sentiments.
I heat embossed the Season’s Greetings in silver embossing powder, directly onto the photo frame, using Silver Metallic embossing powder from WOW! Embossing. The silver works so great with the blues, don’t you think?

The second snowman is a bright and jolly fella!! He’s all about the colours, with a rainbow striped hat, mittens and scarf. My husband said he looks like an Aussie beach snowman, as they have Christmas in the summer down under, LOL!

This background was made with some Hero Paste and the Sprinkled Dots Stencil, which might be sand flying all over the place if you go with The Man’s Aussie snowman thing. The sentiment here is also from Holiday Season Messages, only this time I heat embossed it in Rich Gold, again from WOW! Embossing. I also cut out the smaller 2 and 4 from the number diecut sets, two of each. One in white card stock and one in gold glitter card stock.

Could we take a second to look at the sparkle in that glitter card stock? Just look how gorgeous it’s shimmering in the sunlight. Look at all of those auras of sparkliness!

Ok, that’s it from me for today, but I hope you enjoyed these cards! Don’t forget to hop along and leave comments for your chance to win one of those $50 gift cards. The next stop on the hop is my friend Karen Boyce.

Down below you can find compensated affiliate links to some of the products I have used, at no extra cost to you. Thank you if you chose to support me by shopping with these links, I really appreciate it.

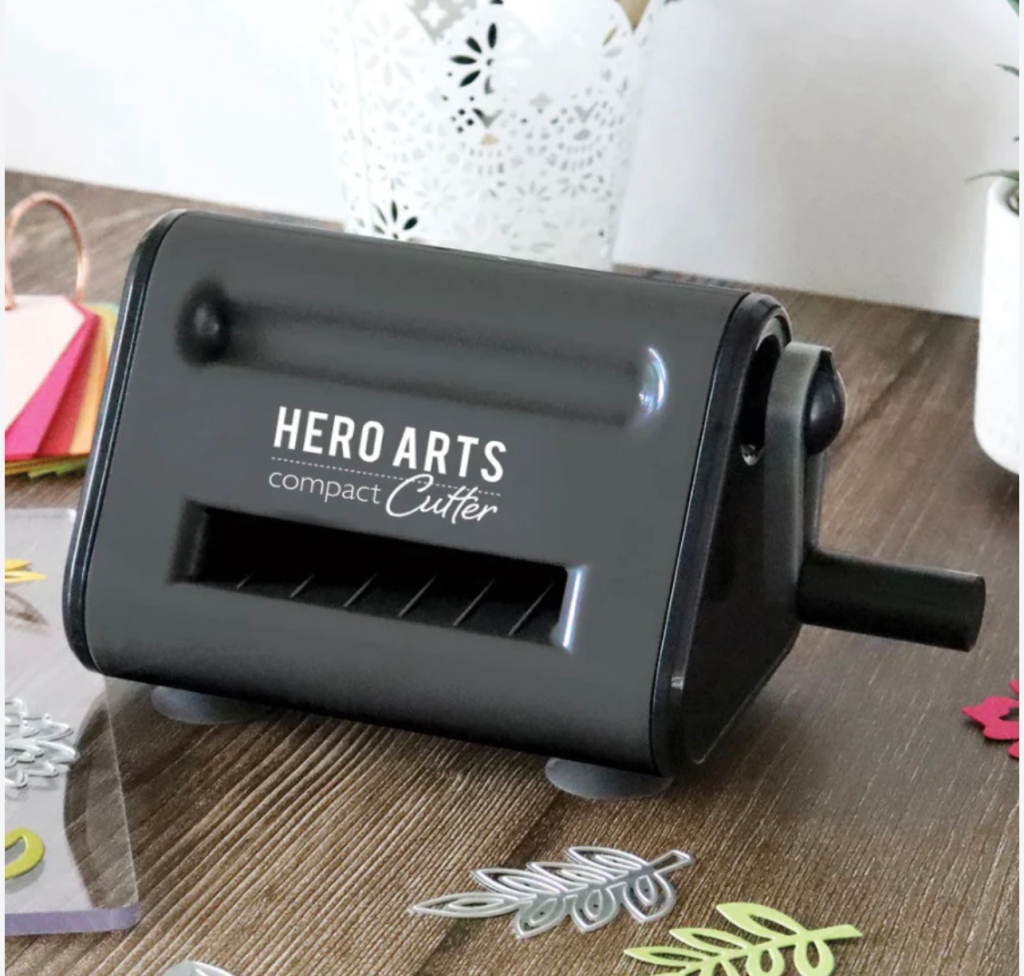
Compact Cutter

Thank you so much for stopping by today, I hope to see you soon again! If you prefer videos, I have a YouTube video up on my channel too. Click on the thumbnail below and it should take you to the video, but just in case that doesn’t work, you can also CLICK HERE.


Lots of love and happy crafting from Erica

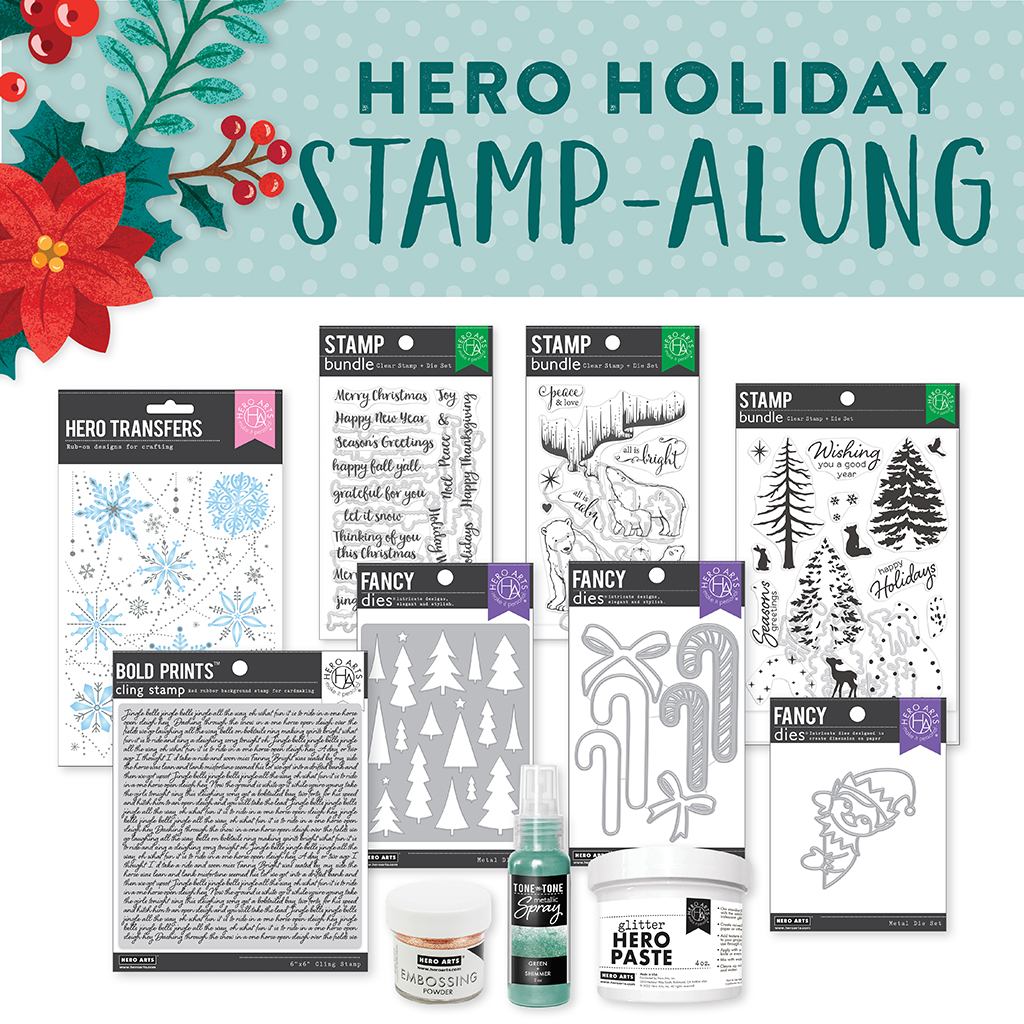
PS If you like learning from fabulous crafters and actually craft along-side some of your favourites, why not join in the Hero Holiday Stamp-Along on Nov 4-5th? If you get your ticket before Oct 2nd, you get the early bird price of $45, instead of $50 too.

If you don’t have the products used for the classes, either use what you have or snap up the discounted bundle here. If you get the bundle you save over 10% of the cost of the products if you bought them individually.

July My Monthly Hero Kit | Hero Arts Global Team blog hop and giveaway!

The Hero Arts Global Design team is blog hopping today, sharing inspiration for our July product release. We have a $25 voucher to Hero Arts to give away to one lucky winner!
To enter the giveaway, leave a comment on each stop on the hop (more comments = more chances of winning).
The giveaway will close August 10th, 2023. Winner will be notified in a reply to their comment.
Visit the Design Team:
Arjita
Erica (<—– That’s me!)
Karen
Lisa
Lounon
Michelle

Now that all of the giveaway details are covered, good luck by the way!, I’m going to get into my cards. I made three with the July Classic My Monthly Hero kit, and there is a video for this on YouTube too!

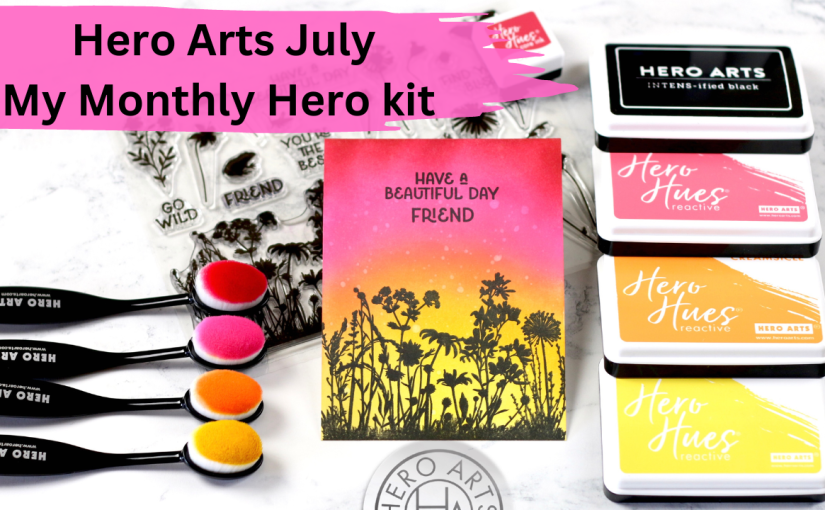
At the time of writing this blog post, both the CLASSIC KIT, seen below, and the PREMIUM KIT are still available. If you want it, grab the one of your preference quickly as once they are sold out they are gone.

My first card is made with lots of ink blending, it’s my love language, after all. And what better background for that beautiful cluster of wildflowers?

From bottom to the top, I have used Lemon Drop, Creamsicle, Taffy and Crimson. Originally I was all gung-ho about heat embossing the stamp and splattering gold water colour on top, but I switched tactic a little. I splattered water on top of the ink blending to create some dreamy texture and I stamped up the image, as well as a sentiment, directly on top. No heat embossing, no nothing. Just Intens-ified Black ink and bam, done.

My second card is using the same stamp, only on a different inky background. For this one I dragged mini ink cubes in Butter Bar, Arctic and Green Apple over a card base to create a pattern.

On top of this I stamped the flowers, again in Intens-ified black ink.

The ‘hey you’ is made by cutting out letters with the Luggage Lowercase Alpha Dies, out of gold glitter card stock. I added a little heart to for a sweet touch.

My final card, with the classic kit, is another very simple idea but it looks so fun and fresh! Here I dragged the Ombrè Reactive Ink pad that comes in the kit over the stamp, and then stamped that directly onto white card stock. The effect is so fun!

You get all those colours, AND texture, in one fell swoop! On top of this one I did splatter some gold water colour, and I finished it off with some dandelions cut out of the gold glitter card stock, as well as a sentiment. Easy peasy, but it’s cute, isn’t it?

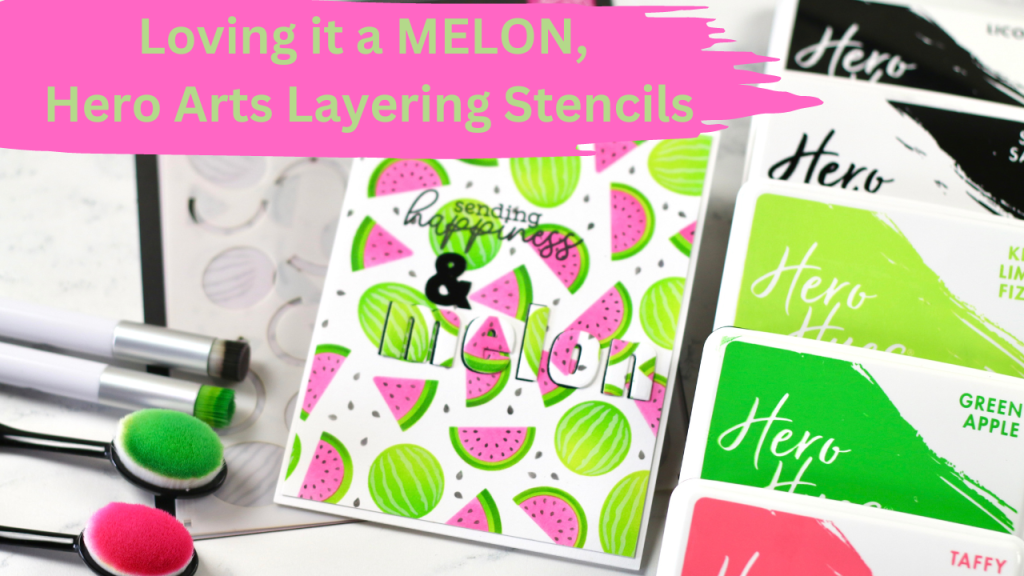
Now, let’s chat melons! This Color Layering Watermelon Stencil set comes with three stencils and they couldn’t be easier to use. This is an add-on for July and reasonably prized too.

I went for a popping pink kind of melons, using Taffy for the insides and Key Lime Fizz, Green Apple and a touch of Pine inks for the rinds. For the veins on the melons, I used Sea Salt pigment ink for a soft look, rather than using Licorice, like I used for the seeds.

I have used an array of blending brushes, both from Hero Arts as well as the itty Bitty Bunny Brushes from The Rabbit Hole Designs. The tiny ones are great for all those little details!

The finished panel was trimmed down to 5.25″x4″ and adhered to a card base.

The sentiment is from the Lemonade Day stamp set, and I stamped it with Intens-ified black ink with the help of a MISTI. To finish off the sentiment, I used the Luggage Lowercase Alpha dies to cut out the word ‘melon’ out of the left over ink blended panel. These are layered up with black card stock letters to make them stand out a bit more.

I had so much fun making this card and I will definitely use this stencil set again! Oh, I have a video over on YouTube for this card too. Click the thumbnail below, or THIS LINK HERE, to go check it out.

That’s it from me for today! I hope you have enjoyed this post and the rest of the hop. I have used some compensated affiliate links in this post, at no extra cost to you whatsoever. If you shop with these links, I get a small commission from the company directly, as a thank you for directing you to them. This never, ever cost you anything, but helps me tremendously behind the scenes. Thank you so much if you shop using my links, I really appreciate it!

Lots of love and happy crafting from Erica

Alex Syberia Designs “Christmas In July” Release Blog Hop and Giveaway

Hi everyone!

Today I’m excited to take part in the Christmas In July release from Alex Syberia Designs, with their design team and friends! If you want to start at the beginning of the hop, CLICK HERE to go to the Alex Syberia blog post, but if you got here from Emelie, my fellow Swede!!, you are on the right track!

It wouldn’t be a celebration without a giveaway and some amazing prizes, and Alex Syberia Designs is giving away two £15 gift cards to the Alex Syberia Designs store and one full release bundle, valued at £366 ($400) in total. Yes! You read that right!! You can win the ENTIRE RELEASE!!

Alex Syberia Designs will pick the three winners from the comments left on each designer’s blog post in this hop before midnight BST on July 23rd 2023. The winners will be announced on the ASD Release Blog Hop post on July 24th 2023.

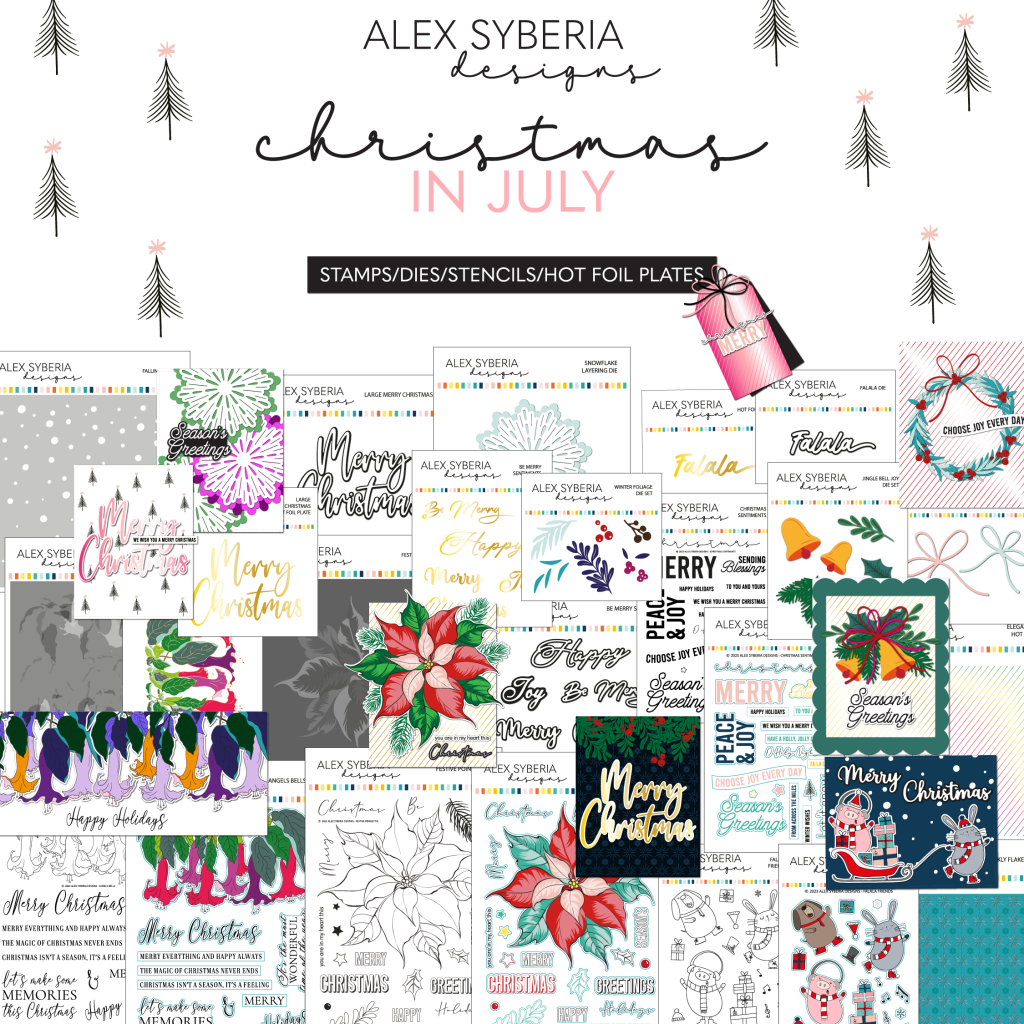
There are so many amazing and inspiring products in this release. You can pick and chose from stamps, diecuts, hot foils and layering stencils. Everything you’d need for getting a head start on your holiday cards!

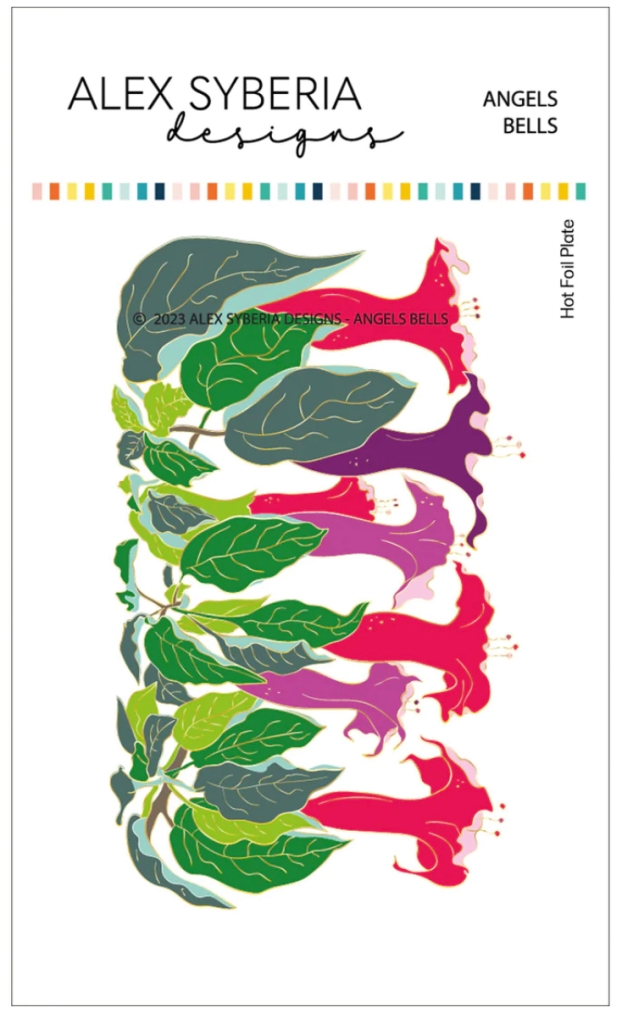
I’ve focused on the Angels Bells set for this hop, and I’ve used all of the four coordinating products on two cards. There is a gorgeous big stamp set, and the coordinating diecut cuts out not just the outline, but also bits between the leaves and flowers! There is also a hot foil plate, and layering stencils for adding colour, if you don’t want (or don’t have the time) to colour.

For my first card I did the Angels Bells hot foil plate in Gold foil, and then used the layering stencils with red and green Pinkfresh Studio inks. I probably should have googled what Angels Bells look like in nature, but I went for colours I felt were what they look like naturally.

When that was done, I used the coordinating diecut on the image and set that aside, while I settled on what background to use. I settled on one I had leftover from a crafting session with the May release. This is the Glowing Geometry hot foil plate, and done with Champagne foil.

So confession time: I am one of those people who go to town while I have the Spellbinders Glimmer hot foil machine on. It just makes sense, right? I do find that I get the best results when the machine has been on for a while, as it’s more evenly heated.

I had also hot foiled the Large Merry Christmas sentiment in Red foil, on black card stock. For piece of cake cutting, I used the coordinating Large Merry Christmas diecut, which you can use on its own too.

The second card is also done with the hot foil plate and layering stencils, but in a what I am going to call tropical vibe colour scheme. I also used the Angel Bells stamp set to heat emboss it on Dove card stock from Concord & 9th. The sentiment is from the Angels Bells stamp set too, and is heat embossed in the same Opaque Bright White embossing powder from WOW! Embossing, on Grape Soda card stock, also from Concord & 9th.

This photo is pretty rubbish, in terms of focus, BUT look at that foil glowing! This is the Moondust foil, and it’s freaking amazing!

Also, I’m fully aware this is a bit of a wild colour scheme for Christmas but I suppose it could be a birthday card for someone who has a birthday in December.

The final touch was adding some Aurora Dew Drops from Crafty Meraki, with some Nuvo Deluxe Adhesive and the Crystal Katana Bamboo jewel picker.

Right, so that’s it from me for today but don’t forget to check out the rest of the hop and comment along the stops for more chances to win!

Blog Hop Order:
Alex Syberia Designs
Jennifer
Aditi
Allison
Ardyth
Bobbi
Brenda
Cheryl
Emelie
Erica
Erin
Lien
Nicoletta
Raquel
Sandi
Sylvie
Therese

As always, I have used some compensated affiliate links in this post, at no extra cost to you. If you shop using these links, I get a small commission directly from the company it’s linked to, but it never ever cost you an extra penny. This is how I earn a little bit of income to pay for web hosting, blog hosting, tools and equipment, and all the basics like glue, paper, inks etc. It’s a way for me to keep producing free content for you to enjoy, so thank you for the support! I appreciate it more than you will ever know!