

Hi guys!
Today’s post is a quick one as it’s mostly about the YouTube video I made for it. I’m participating in a little video hop today with a twist! The participants are using a video of one of the fellow hoppers as inspiration and making projects with their take on it. The lady before me does a lot of work resin, which has been on my want-to-try-that list for ages as it looks like a lot of fun!
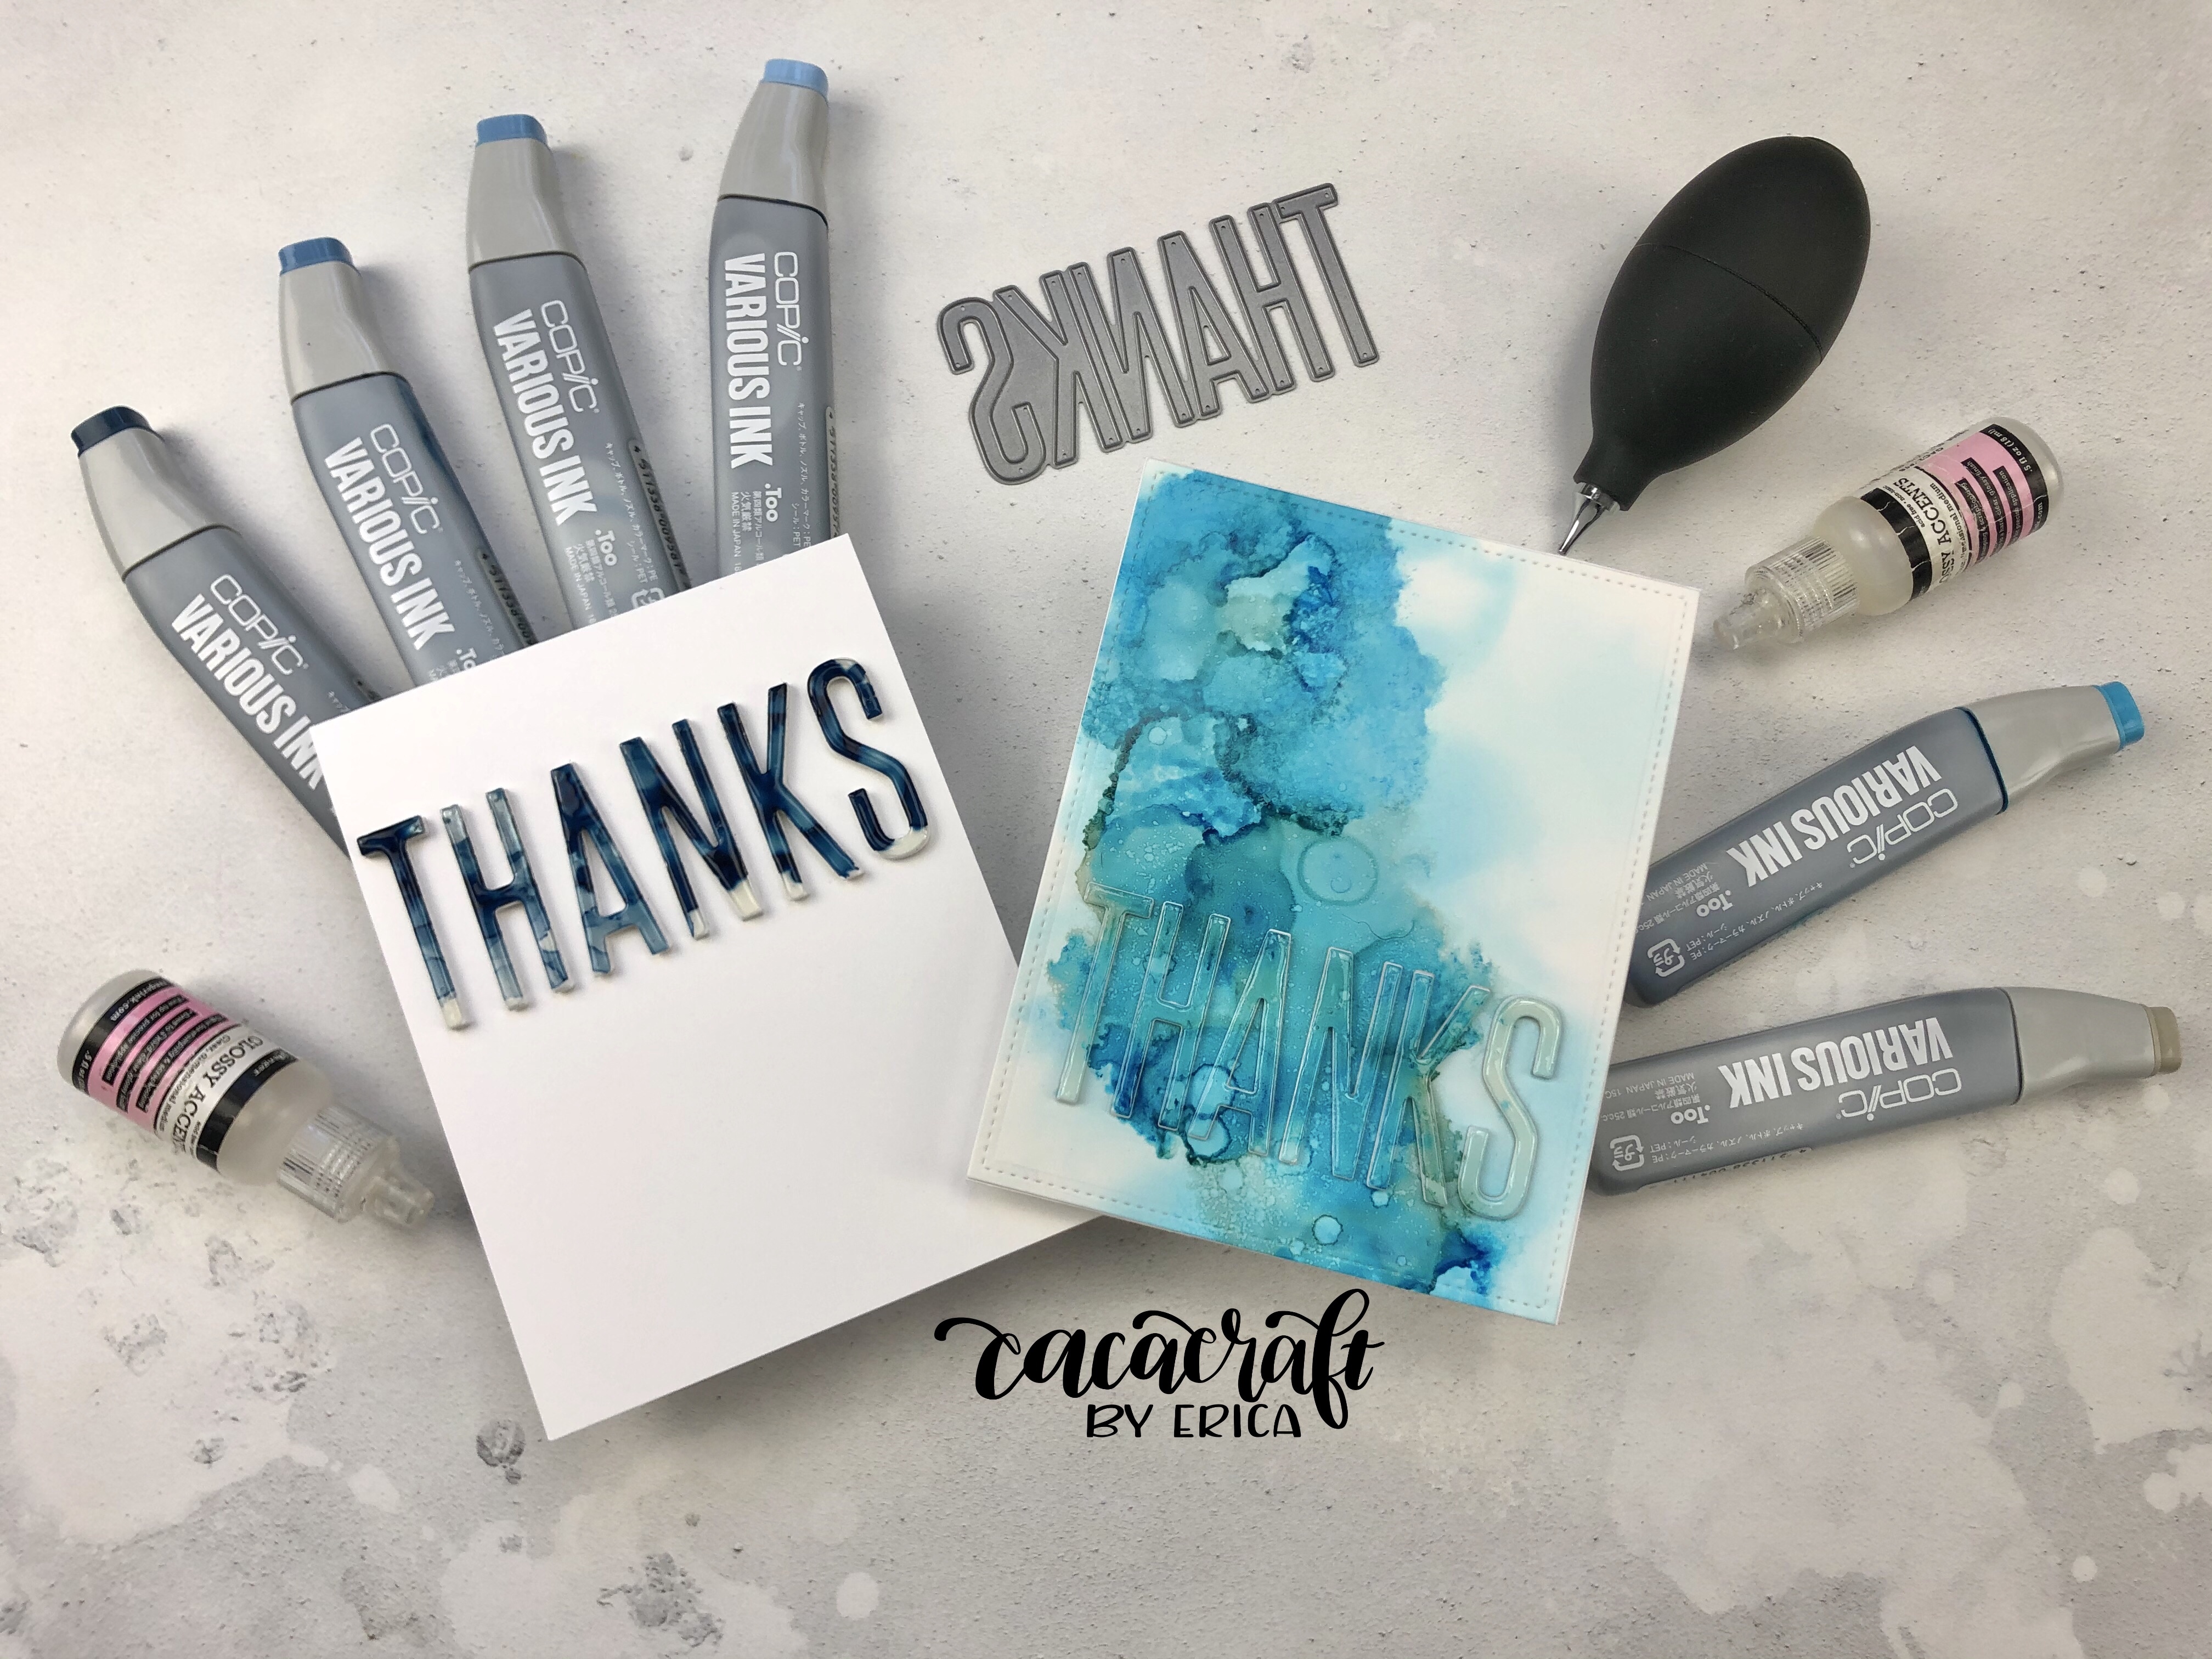
As I don’t have any resin, nor could I get any in time to make a video with it, I decided to do a fake resin look using Glossy Accents instead. I have seen loads of tutorials with alcohol ink tiles and coasters made with it, so my idea was basically to create alcohol ink pieces and turn them into cards as I am primarily a card maker.

On the first piece, I used some light blue and warm grey Copic refills to create a fun background. This is Yupo paper so the magic practically happens by itself. It’s so fun to do!
I cut the panel down using a stitched rectangle die from Lawn Fawn, and I also cut out the word Thanks using a die-namic from MFT Stamps. This exact one is retired but there is a very similar one from Flora & Fauna. I also cut out four more Thanks out of white card stock, and layered these all up with the glue tube adhesive from Lawn Fawn.

This whole shebang was added to a card base and a very generous layer of Glossy Accents was added to the Thanks. This was then set aside to dry overnight.
The second card is SUPER Clean And Simple. So much so I kind of feel it’s a bit naked!

I used the same Thanks and cut out loads of them out of white card stock and once out of a already made alcohol ink panel. This one is also made with Copic refills. B91 to B99, my favourite blue Copic combination.

These letters I adhered directly to a white card base, with the help of a ruled taped down to make sure they went on straight. Then another generous helping of the Glossy Accent. I tried making sure to pop all the bubbles in the Glossy Accent on both cards but a few managed to survive.
That is basically it for these! So simple but I’m rather pleased with my take on this challenge. Not to mention very proud of myself for not adding sequins to the white one! I almost had to sit on my hands to avoid it, lol!
You can find the video on my YouTube channel, by clicking HERE.

Thanks for stopping by today, I hope you get a chance to watch the video and found some inspiration here.
Lots of love and happy crafting from Erica
You can find me on various social media platforms if you want to see more of my work. I have also used some compensated affiliate links in this post. If you shop using these links I get a small commission directly from the company, at no extra cost to you whatsoever. Thank you for supporting me by using these links if you shop!
My blog (that’s right here)
